RECIPES

vanilla Fig jam
When your neighbour gives you a whole lot of super ripe figs (too many to eat!) or if you find some less than perfect figs at the fruit shop, make some jam! This one is not too sweet and totally delicious poured on yoghurt, as the filling for a fig crostata or simply on bread.

We had a fig tree in the backyard growing up. It sadly had to be pulled out after a few years because the septic system was being upgraded. The adults were all terribly upset about this. 12 year old me couldn't imagine why they were so upset. It seemed to be a terrible bore to have to wrap the whole top of the tree in nets when the figs were starting to ripen. And it didn’t stop the birds making a hell of a racket and some of them always seemed to find a hole in the net. Both my parents would yell through the kitchen window at meal times to try to frighten the birds away. Actually I didn’t mind if the birds ate the fruit … the truth was, I didn’t like figs. WHAAAAAT?! Yes, it is true. My love of figs started in my 40s.
And while we are on the subject of things you may not know about me… I did not drink coffee until my 30s. I can hear you mutter …”but I thought she was Italian?!” It is certainly a crazy thing but I think I am making up for it now, both with my daily obsessive consumption of percolator coffee and with my adoration of figs.
Finding good figs is mostly elusive unless you know someone with a tree in their backyard. This year I have been very lucky as my friend Elena gifted me a couple of kilos of just-picked beauties from her mother’s tree. They were green ones, the quality was like nothing I had tasted since my last trip to Italy at the end of summer 2022. We ate almost a kilo of Elena’s figs in a few days and then, as they were ripening faster than I could eat them, I made jam. This is the recipe I used. And it is crazy good poured over thick yoghurt (NB. you might like to make it a bit runnier like I do if you will mainly use it this way), in a jam crostata or simply on crusty bread.
You don’t need an excess of ripe home grown figs to make jam; less than perfect ones from the fruit shop (picked too long ago or a bit dry on the inside) also work fine.


vanilla fig jam
makes about 3 x 375 ml jars
1.1 kg fresh figs
470g sugar
1/4 cup freshly squeezed lemon juice
1 lemon zest
1 tsp vanilla bean paste
and a splash of grappa (optional)
Remove the stem part of the figs and chop into bite sized pieces (smaller if you do not like chunks of fruit in your jam). Place in a heavy bottomed saucepan with the sugar, juice and zest. Let them sit for an hour or so.
Turn the heat on low to dissolve the sugar, then increase slightly to medium, stirring occasionally. Let the fruit bubble away for about 40 minutes, checking every now and then to make sure the fruit is not sticking. Eventually it will start to visibly thicken.
While the jam is cooking, place clean upturned jars and lids in a 100C conventional oven for about twenty minutes. Let them sit in there with the oven off until ready to use.
Place a small plate in the freezer (this will be used to test the jam set) and have a few teaspoons ready.
To test if the jam has thickened sufficiently, carefully pop a clean teaspoon into the jam and pour it onto the plate that has been sitting in your freezer. If the jam is thick on the plate, it is ready. If it is runny, then cook a few more minutes, and test again. Once you are satisfied with the jam set, turn off the heat, stir in the vanilla bean paste (and a splash of grappa if you dare!) and allow to sit there for 10 minutes or so.
Pour the hot jam carefully into the previously prepared clean jars (make sure they are still warm! Don't put hot jam in cool jars or they may crack) almost to the top; then seal with a lid. Repeat until you have used up all the jam. If you have one jar that is half full, this should be used first and once it cools down, store in the fridge.
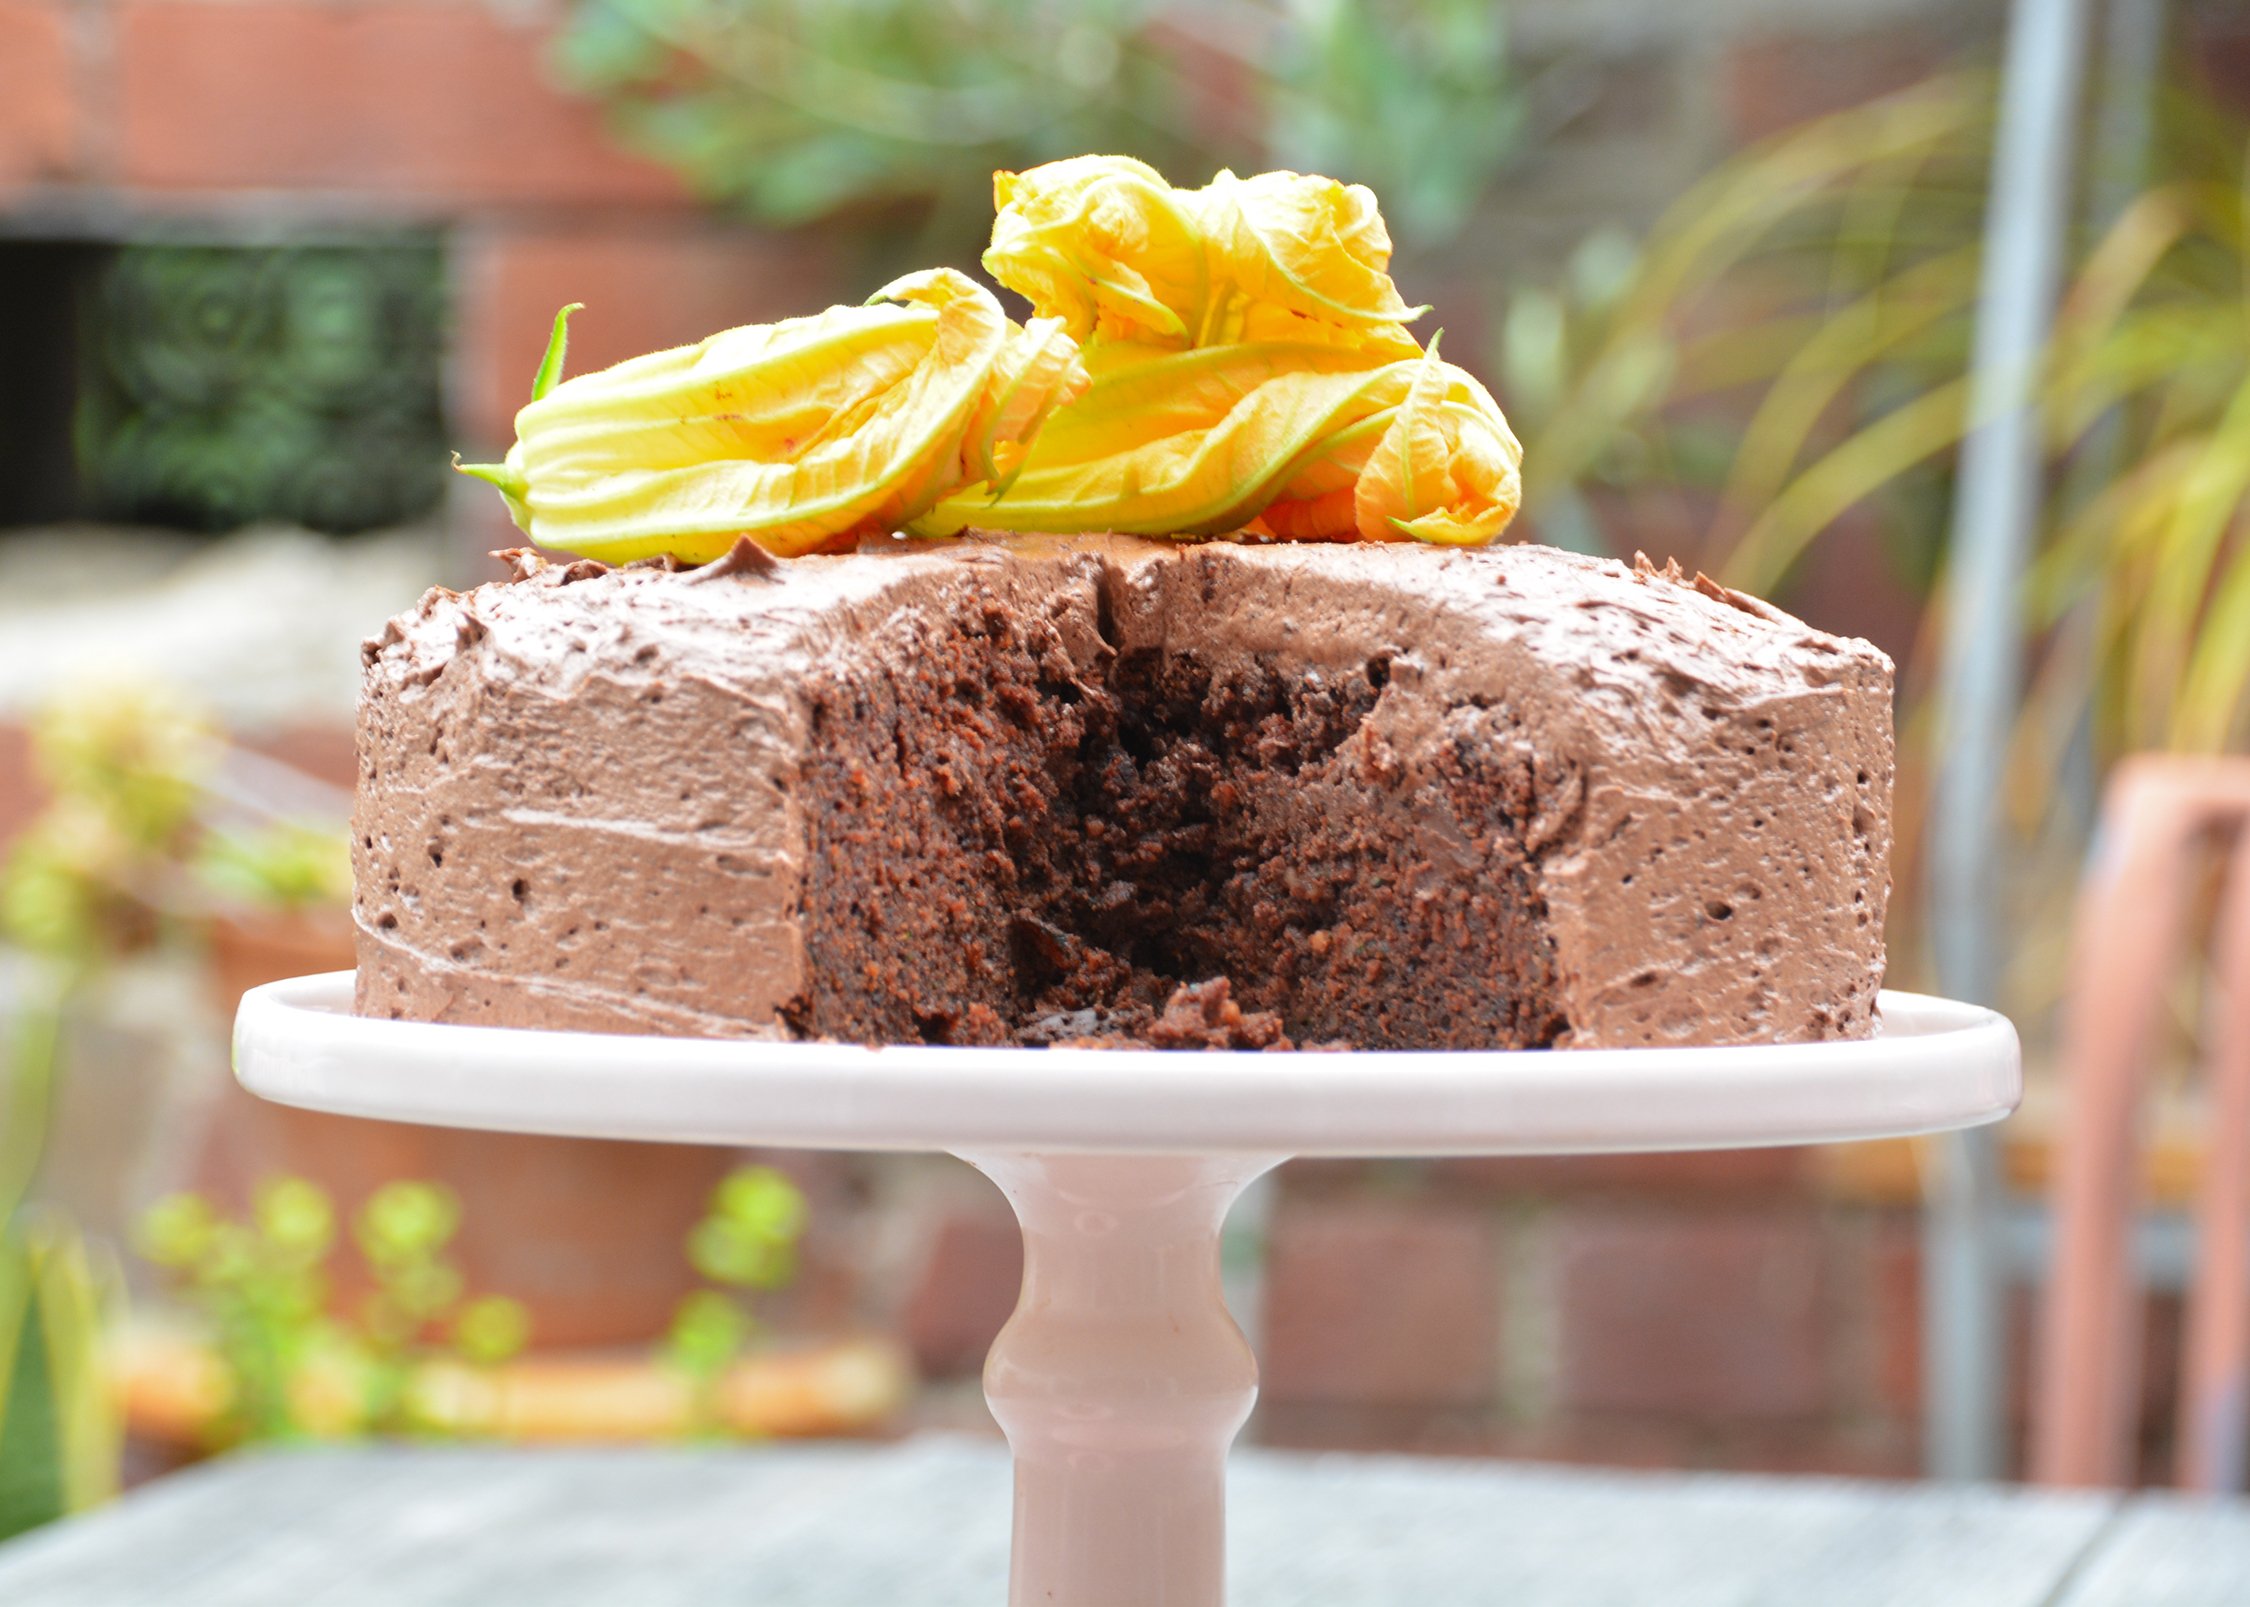
CHOCOLATE ZUCCHINI CAKE
If you have a glut of zucchini in the garden at the moment (or a neighbour with some!) and you sick of making savoury dishes, then why not try something sweet? Zucchini are bland enough to work really well in cake batter. I think zucchini cake was a real thing in the 1980s or 90s. I love a bit of retro baking, and if you do too, then this recipe may be right up your alley.

If you have a glut of zucchini in the garden at the moment (or a neighbour with some!) and you are sick of making zucchini fritters and peperonata, then why not try something sweet? Zucchini are bland enough to work really well in cake batter. Together with the humble carrot, zucchini became popular as a cake ingredient in the 1980s (well that is when it first entered my sphere). I love a bit of retro baking, and if you do too, then this recipe may be right up your alley.
This recipe is based one I found online by My Darling Lemon Thyme. It is gluten free and deliciously moist. I sometime make it with a fancy icing (like in the photos), but other times just dust it with icing sugar or have it plain. It works so well either way. You can substitute the GF flours in the recipe for regular flours if you do not have a sensitivity to gluten. And if the zucchini are overly large and have seeds in the centre, scrape these out before grating them for the cake batter.


CHOCOLATE zucchini cake
125g butter, softened
200g brown sugar
3 eggs
75g almond meal
1 tsp pure vanilla essence
120g sour cream
150g gluten free plain flour
75g gluten free corn flour
40g bitter cocoa
2 tsp baking powder
1/4 tsp fine sea salt
1 tsp ground cinnamon
375 g grated zucchini (keep skin on)
100g of 70% cocoa chocolate, chopped into small pieces
Butter cream icing (optional):
1/3 cup bitter cocoa, whisked to remove lumps
125g butter, softened
1 and 2/3 cups icing sugar, sifted
1/3 cup milk
1/2 tsp pure vanilla essence
zucchini flowers for decoration (optional)
Preheat the oven to 170C. Grease and line a springform cake tin 22cm diameter. Cream the butter and sugar until thick and creamy, then add the eggs one at a time, beating well after each addition. Add the almond meal, vanilla and sour cream and beat well. Add the dry ingredients and fold them through, then add the zucchini. Once the mix looks homogeneous, fold in the chopped chocolate. Pour into the prepared cake tin (it will be very thick) and pat down to smooth it off. Bake for 50 – 60 mins (you may need to drop the temperature for the last 10 minutes) until the centre of the cake is dry on top and a skewer inserted in the centre comes out clean. Cool in the tin for at least 30 minutes.
For a very festive cake, make the butter cream icing by placing the cocoa and the chopped butter in the bowl of a mixer stand and beat until well combined. Add about 1/2 cup of icing sugar and a tablespoon of milk and beat on high speed for a minute. Repeat, beating for a minute after each addition until you have used up all the milk and icing sugar and then beat in the vanilla essence as well. If the consistency is too thick, add a splash more milk; if it is too runny, add a tablespoon of icing sugar. Beat another minute and check the consistency again. It should be easily spreadable but quite stiff. Ice the cake and decorate with zucchini flowers.

rustic fig and hazelnut cake
Figs seem terribly decadent to me. It must be all those luscious red filaments when you cut one open, eating the soft sweet inner flesh directly off the skin. Such a short season for this heady delight that nature has created with such perfection.

Figs seem terribly decadent to me. It must be all those luscious red filaments when you cut one open, eating the soft sweet inner flesh directly off the skin. Such a short season for this heady delight that nature has created with such perfection.


This cake or variations using different fruit or a different nut flour are often on my table in the warmer months (apricots, peaches, plums and almond meal/flour), but it is very special when figs are in season.
The cake does not have many steps and apart from beating the butter, sugar and eggs with an electric mixer, it is mixed by hand. So it is hard to get wrong. Fresh figs are arranged in a pattern on top of the uncooked cake making the cake look festive. By pushing the figs down a little with your finger, the cake cooks around them and they keep the cake really moist. You can splash a bit of brandy on top of the cake once it is cooked (for that real Italian flavour!).
rustic fig and hazelnut cake
140g plain flour
120g unsalted butter at room temperature
160g caster sugar
2 large eggs
2 tsps baking powder
60ml milk
125g hazelnut meal
5 or 6 fresh figs, depending on size
a splash of brandy to serve (optional)
Preheat oven to 170 degrees. Grease and line a 20cm diameter cake tin. Beat the butter and sugar in a food processor until creamy. Add the eggs one at a time beating well after each addition. Place the mixture in a bowl and add half the flour, mixing well with a wooden spoon. Add the milk. Mix until incorporated, then add the rest of the flour, the baking powder and a good pinch of salt. Make sure it is all evenly mixed and finally add the hazelnuts.
Place the mixture in the prepared cake tin. Press the fig halves a few centimetres into the cake to any pattern you like, cut surface of the fig side up. As the cake rises in the oven, the figs will sink a bit into the cake, so don’t push them all the way down. Bake for around 60 minutes. The cake is ready when a skewer placed in the centre comes out clean. Rest for 15 minutes before turning put of the tin. Serve the cake with a dollop of mascarpone, whipped cream or vanilla ice cream. You can also splash some brandy on the cake if you like.
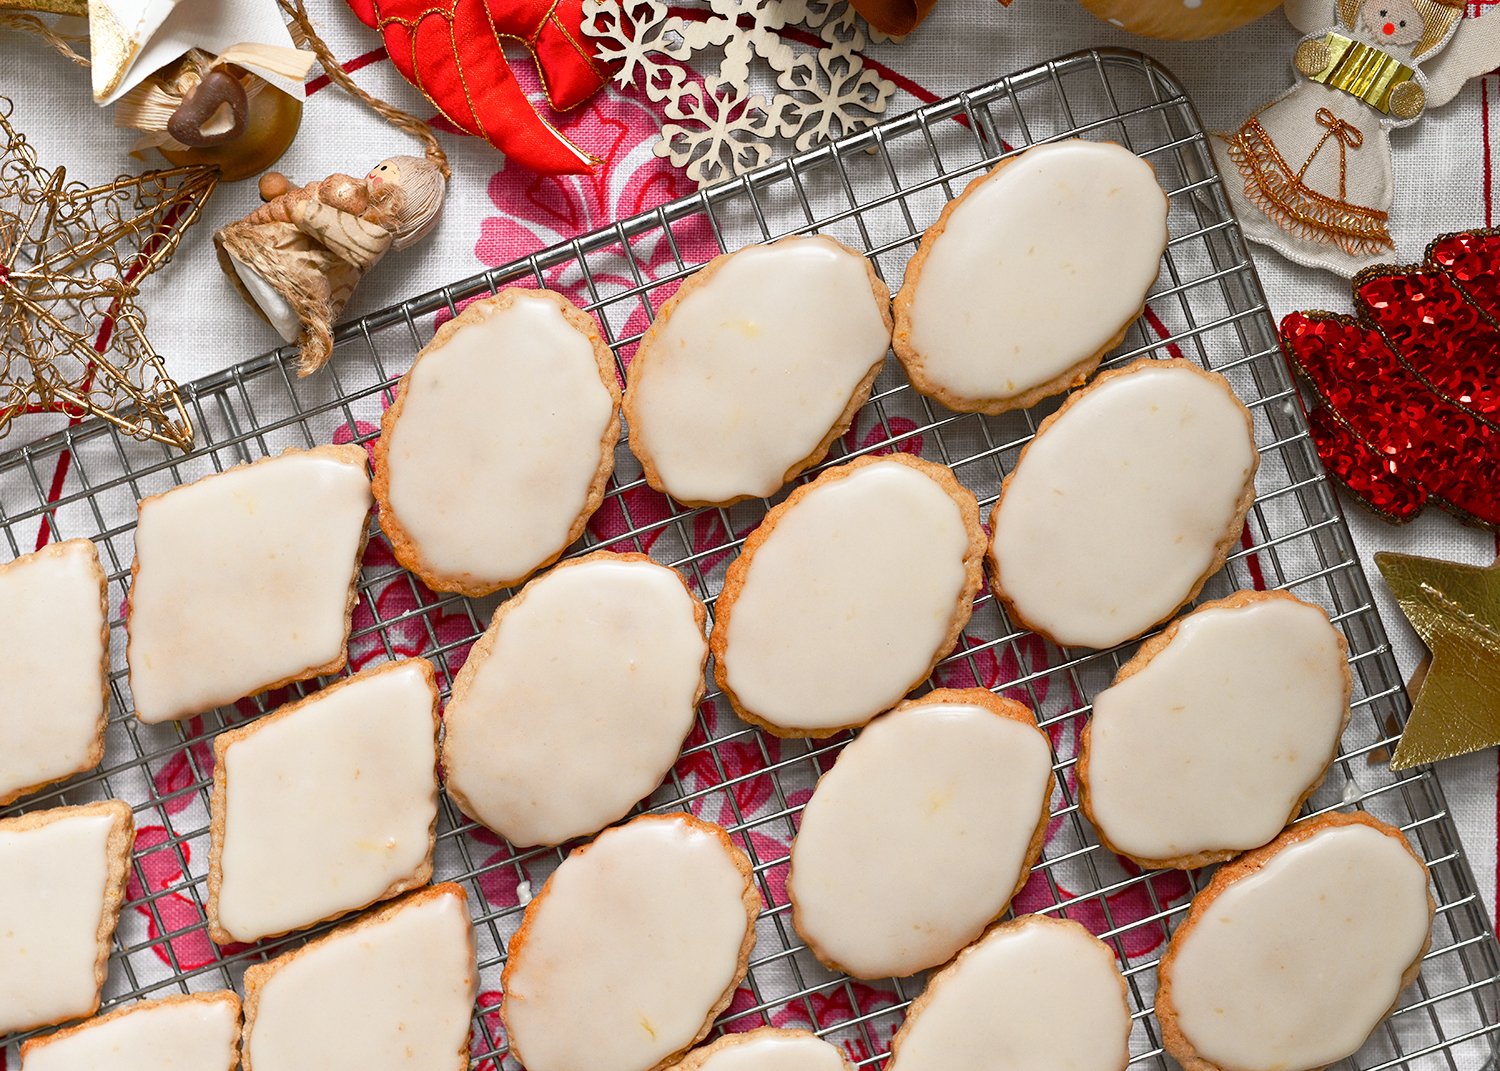
spiced orange and honey biscuits
These are rather delicious and simple biscuits/cookies that make the perfect Christmas gift. That said, it is perfectly acceptable to not give them away, you probably won’t want to! They marry some gently warming spices with orange, making the most delicious combination. Use any cookie cutter shape you have to make them - stars would be very pretty.

These are rather delicious and simple biscuits/cookies that make the perfect Christmas gift. That said, it is perfectly acceptable to not give them away, you probably won’t want to! They marry some gently warming spices with orange, making the most delicious combination. Use any cookie cutter shape you have to make them - stars would be very pretty.

Bake them 12 minutes if you like a softer biscuit and 15 - 16 minutes if you would like that crunch. The recipe is based on one on the Giallo Zafferano website.
spiced honey and orange biscuits
300g plain flour
130g sugar
1 scant tsp baking powder plus a good pinch of salt
1 tsp cinnamon
1/4 tsp each cloves and allspice
zest of 1/2 orange
2 eggs 100g unsalted butter at room temperature
50g runny honey
For the icing:
30ml freshly squeezed orange juice
150g icing sugar approximately, sifted
Place all dry ingredients in a bowl of a stationary mixer and whisk to combine. Add one egg at a time, the butter in chunks and lastly the honey with the mixer on slow speed until well incorporated. Roll out on a well floured surface to form a large disc, about 6mm thick. Add a bit more flour if the mix is too soft to handle. Wrap and chill for about 20 minutes.
Cut the dough into Christmassy shapes using your favourite cookie cutters, re-rolling scraps. Place in a pre-heated 180C conventional oven. Bake for 12 – 16 minutes. Place on a wire rack to cool.
Whisk icing sugar and juice vigorously until smooth to make the icing. Dip the top of the biscuits in the icing and place on a wire rack until the icing firms up.
(makes 30 - 35 depending on size of shape)

Blood orange crostata
I adore blood oranges; it feels like I always have. It started in the 1970s when I lived in Italy with my parents and sister. I couldn’t quite believe that in Italy they had red oranges (I mean, weren’t they meant to be orange hence the name?). We didn’t have any in Australia. Now we do, though it hasn’t been that many years, and in late winter, we can find blood oranges at most fruit shops.
I adore blood oranges; it feels like I always have. It started in the 1970s when I lived in Italy with my parents and sister. I couldn’t quite believe that in Italy they had red oranges (I mean, weren’t they meant to be orange hence the name?). We didn’t have any in Australia. Now we do, though it hasn’t been that many years, and in late winter, we can find blood oranges at most fruit shops. They have a lovely taste, not as sweet as Navels or Valencia, but with a slight bitterness and a rich sweetness that some say is like raspberries, and ruby red streaked flesh that stains the white pith when they are cut in half (and your marble work bench if you are not careful).
I remember sitting on my father’s knee when I was 4 or 5; he would slices oranges for me to eat while we watched TV. He would peel them, removing all the white pith and cut them into thick pinwheel-like slices ready for me to eat. When I was a bit older (and still a bit fussy), I refused to eat the orange segments that were handed out at half time during netball matches. Segments seemed so utilitarian compared to colourful pinwheels, and the texture seemed wrong as you had to bite through the membrane to get to the sweet juicy inner flesh. Even nowadays I peel then slice regular oranges into pinwheels. But my favourite oranges are the blood variety. Cut one open and you get a stunning array of colours, from orange to deep red, you never quite know how deep the red will be. You wouldn’t see this if they were in segments.

I make a crostata to highlight the beautiful colour gradient you often see in blood oranges. It is a simple slightly salty shortcrust base, layer of home made sweet orange jam (recipe in my cookbook Adriatico) or apricot jam and thin slices of jewel-like blood oranges.
Blood orange crostata
250g plain flour
60g sugar
big pinch fine sea salt (to taste)
125g unsalted butter, cut into small dice and cold from the fridge
1 egg, lightly whisked and mixed with
1/2 tsp pure vanilla essence
1/3 jar sweet orange jam (not marmalade) or apricot jam
2-3 blood oranges, peeled and cut into slices
1 – 2 teaspoons sugar extra
Extra thick Greek yoghurt or creme fraiche to serve
To make the pastry, place the flour, sugar and salt in a large bowl and give a quick whisk to combine. Alternatively you could place it in the bowl of a food processor and pulse briefly. Drop in the cold butter and rub into the dry ingredients with your fingers tips until it resembles wet sand. Add the egg and vanilla, gently bringing the pastry together into a ball. Add a teaspoon or two of cold water if the mixture does not come together easily.
You could also make the pastry in a food processor by pulsing the butter into the dry ingredients then dropping in the egg (and cold water if needed) until the dough comes together. Flatten the pastry into a thick disc with the palm of your hand and wrap in baking paper or cling film and place in the fridge for at least an hour (overnight is fine).
Turn the oven on to 180C conventional. Roll your pastry out between two sheets of baking paper (or cling film or just using a floured work surface) until it is slightly larger than the base of your tart tin. I use a 24cm diameter tin with a removable base lined with baking paper. Place the rolled out pastry on the lined tin, pressing it down and halfway up the sides of the tin. Trim the pastry sides with a sharp knife until they are even and no more than 1cm higher than the pastry base. Prick the base with the tines of a fork, cover with baking paper and place in the freezer to chill for 15 minutes.
Place the jam on the pastry base so that it is covered by a thin layer. Assemble the blood orange slices so that the edges of the slices touch, trimming them to fit if necessary. Sprinkle 1-2 teaspoons of sugar evenly over the blood orange slices.
Bake for about an hour or until the edges of the pastry are golden. Allow to cool in the tin completely before serving with thick Greek yoghurt or creme fraiche.
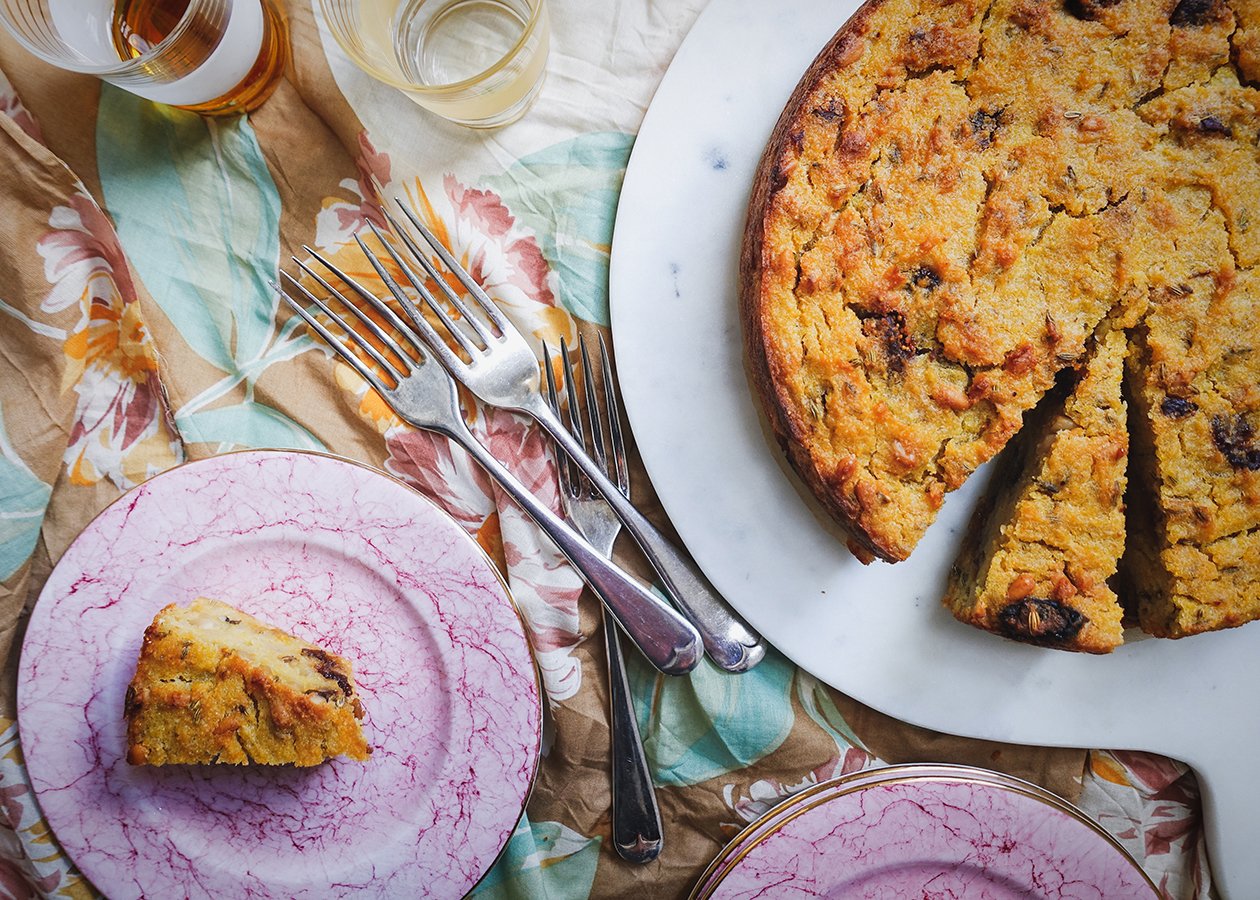
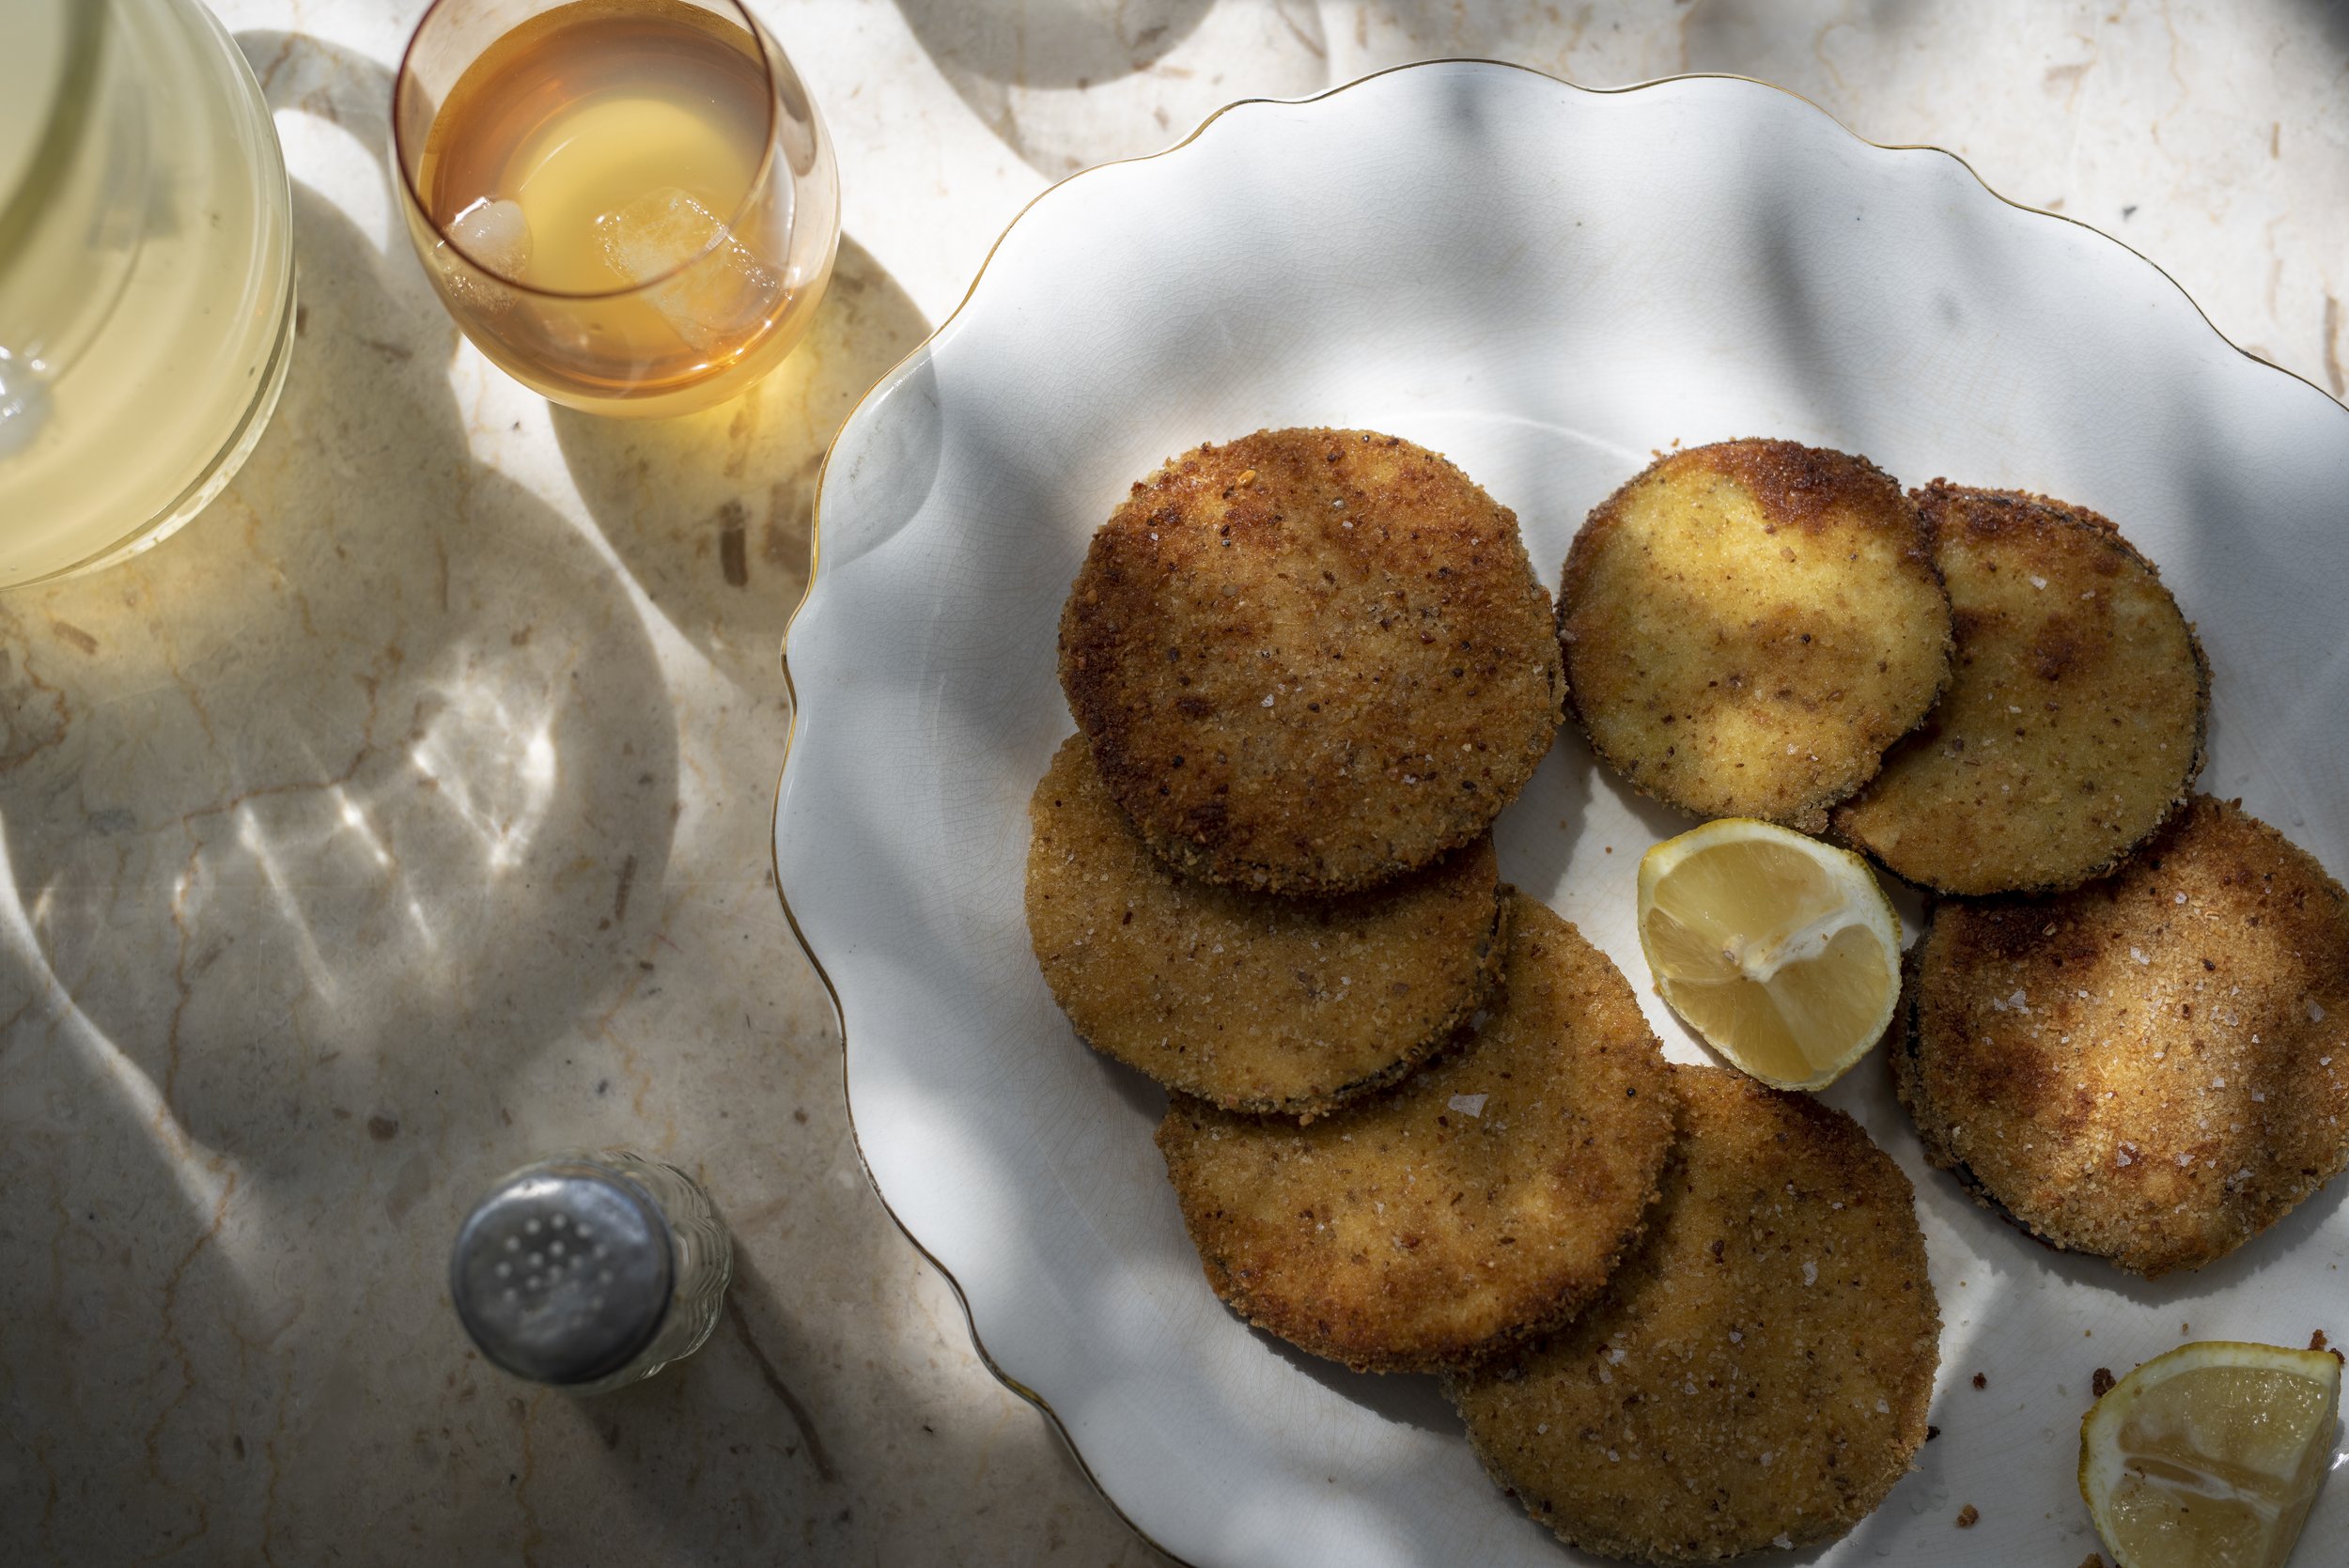
Polenta shortcake
I have many many cookbooks but only occasionally dig them out. And when I do, I wonder why it took me so long. The Essentials of Italian Cooking by Marcella Hazan was one of the first cookbooks I owned. It was published in 1992 and has no photos, but is one of my go-to books for savoury dishes. There is only a small section on sweets and desserts.
I have many many cookbooks but only occasionally dig them out. And when I do, I wonder why it took me so long. The Essentials of Italian Cooking by Marcella Hazan was one of the first cookbooks I owned. It was published in 1992 and has no photos, but is one of my go-to books for savoury dishes. There is only a small section on sweets and desserts.
As I was leafing through it yesterday morning, the polenta shortcake caught my eye, as its uses mainly pantry ingredients and is essentially a mix and bake cake. It is a dense, moist and rustic looking cake, with dried figs, sultanas, pine nuts and fennel seeds. Mark and I have eaten half of it since yesterday and may even finish to off today. I have made a few changes to Marcella’s recipe, and I imagine you also could use different nuts and dried fruit in it. If you do make it, please let me know what you think, here or on Instagram.


Polenta shortcake
140g yellow polenta (not the instant variety)
1 1/2 tablespoons extra virgin olive oil
110g sugar
50g pine nuts
50g sultanas (soaked in grappa if you like, drained)
115g dried figs
2 tablespoons fennel seeds
1 tsp pure vanilla essence
30g butter
1 egg
120g plain flour
Preheat oven to 200C. Grease and line the base and sides of a 22cm cake tin (mine is spring-formed).
Place the sugar, pine nuts, chopped figs, sultanas and fennel seeds in a large bowl and stir briefly to combine. Place the egg and vanilla in a separate small bowl and whisk briefly to combine.
Bring 500ml of salted water to the boil. Pour in the polenta slowly, whisking the whole time. Keep whisking, add the oil and then replace the whisk for a wooden spoon. Cook for a few minutes until it thickens. Remove from the heat and scrape into the bowl with the dried fruit and stir through. Add the butter and stir until it has melted and combined, then add the egg and vanilla mixture and stir that in. Lastly add the flour and mix well so that the cake mix is homogenous. Scrape into the prepared cake tin and smooth the top as well as you can with the back of a spoon.
Bake for 45-50 minutes until golden on top. Remove from the cake tin and set on a wire rack to cool completely before serving.
Lasts 3-4 days in a lidded container placed in a cool spot.

Crostata di crema – custard flan with almonds
There are several certainties when you visit the Salento: you will see fields dotted with gnarly trunked olive trees that are over a thousand years old; you will meet passionate and uncomplicated locals who will generously share their shop/home with you, should you stop and talk to them and you will taste some of the best olive oil in the world. And there is a high probability that you will eat superb food. My love for the Salento, a place that is tremendously rich in its simplicity, is strong.
There are several certainties when you visit the Salento: you will see fields dotted with gnarly trunked olive trees that are over a thousand years old; you will meet passionate and uncomplicated locals who will generously share their shop/home with you, should you stop and talk to them and you will taste some of the best olive oil in the world. And there is a high probability that you will eat superb food. My love for the Salento, a place that is tremendously rich in its simplicity, is strong. I met Viviana, one such generous local, at Masseria Li Veli, a winery in the province of Brindisi. We had stopped there for lunch as part of our Southern Puglia tour in April. Though the focus of our visit was on the wine (including local varieties Verdeca, Malvasia Nera and Susumaniello), the light lunch included abundant servings of seasonal antipasto (I counted six different types), eggplant pasta and a spectacular pastry cream crostata.
I love trying to replicate dishes back at home, so I asked a few questions about the cake, which we ate with a glass of bubbly Pezzo Morgana 2016 Reserve. To my surprise, the chef Viviana arrived in the dining room to have a chat with me about the cake. She smiled when we told her how much we loved her cake and wanted to make it back in Australia. She described the recipe as I took notes: a simple shortcrust pastry base; topped with a lemon scented crema pasticceria, which was cooled completely before spreading it on the base and a shortcrust pastry crumble on top. The base was also a shortcrust crumble. Then she gave me the oven temperature and cooking time. It is not often you find a person so eager to share their recipe (which often, is a closely guarded secret. I have known people to omit a key ingredient when relaying a recipe!). Grazie Viviana! I hope I have done justice to your heavenly crostata.

To make the pastry cream I tweaked that recipe in Adriatico for Torta Pasticciotta (which happens to be in the Salento chapter of the book) and used a shortcrust pastry recipes from my blog for the crumb. I have been trying to reduce sugar in most of my recipes because I am enjoying the taste of it less and less. You might think that this is heresy for someone like me who frequently has cake for breakfast; but I still love the cake, I just want it to be half as sweet as it was. So you will find this recipe is fairly low in sugar, with online recipes for the pastry cream online using 200g of sugar for the same amount of milk, whereas in this recipe I use 70g. It is honestly sweet enough. In a similar vein you will find that the pastry has less sugar than many online. If you have a sweet tooth you can increase the quantity of sugar as much as you like in the pastry cream without altering the method or the other ingredients. If you would like to increase the sugar in the pastry to 100g, follow the same method and decrease the flour to 300g. It will work just as well, but the result will be sweeter.

Crostata di crema - custard flan with almonds
TO MAKE THE PASTRY CREAM/CUSTARD:
500ml full cream milk
1 organic lemon, zest only
4 large eggs, yolks only
70g caster sugar
45g cornflour
pinch fine sea salt
TO MAKE THE PASTRY:
330g plain flour
60g raw sugar
8g baking powder
good pinch fine salt
110g unsalted butter
1 large egg
1 tsp pura vanilla essence
icing sugar for dusting, optional
Butter and line the base and sides of a 28cm cake tin (mine had a removable base) or a tart tin.
START BY MAKING THE PASTRY CREAM:
Remove the zest from the lemon in thick strips, removing as much of the bitter pith as you can. Place the strips of zest in the milk and place on the stove top on medium heat until it warms through. Take off the heat and set aside to infuse while you prepare the other ingredients. Place the eggs, sugar, salt and cornflour in a large heat-proof ceramic bowl and whisk until thick and creamy (I used an electric whisk).
Place the milk back of the stovetop on medium heat and warm until hot but not boiling. Pour the hot milk into the eggs in slow, steady stream, whisking the whole while so the eggs do not scramble. Scrape the mixture back into the saucepan and cook on low heat for at least 15 minutes (you will need that long to make sure you cannot taste the cornflour in the custard), stirring the whole time, until the mixture is thick and coats the back of a wooden spoon. Strain off the lemon zest and discard, and pour the custard into a heat-proof bowl or jug. Set aside, covered, to cool completely (or put it in the fridge if you are in a hurry).
TO MAKE THE PASTRY:
Place the flour, sugar, baking powder and salt in a large bowl and whisk by hand briefly to combine. Chop the butter into small dice; whisk the egg with the vanilla. Add the egg and butter to the flour and working quickly with your fingertips, rubbing the wet ingredients into the dry ones until you make large crumbs. Line the base of your tin with half of them. Flatten the base with a back of the spoon and push some of the crumbs so they ride up the side of the tin slightly (making a space for the custard to be placed a bit later). Bake for about 5 minutes until pale golden. Remove from the oven and allow to cool completely.
ASSEMBLE THE CROSTATA:
Spread the cooled pastry cream onto the base, leaving an edge of just under a centimetre around the edge. Arrange the rest of the pastry crumb on top and around the sides where there is no custard.
Bake for 30 -35 minutes in a static oven at 180C or until pale golden on top.
Allow to cool completely in the cake tin (so if yours has removable sides, you can remove the sides after about 15 minutes). Dust with icing sugar before serving, if you like. The crostata is also nice cold from the fridge a few days later. Make sure you store it in an airtight container.

Mandarin, almond and chocolate cake
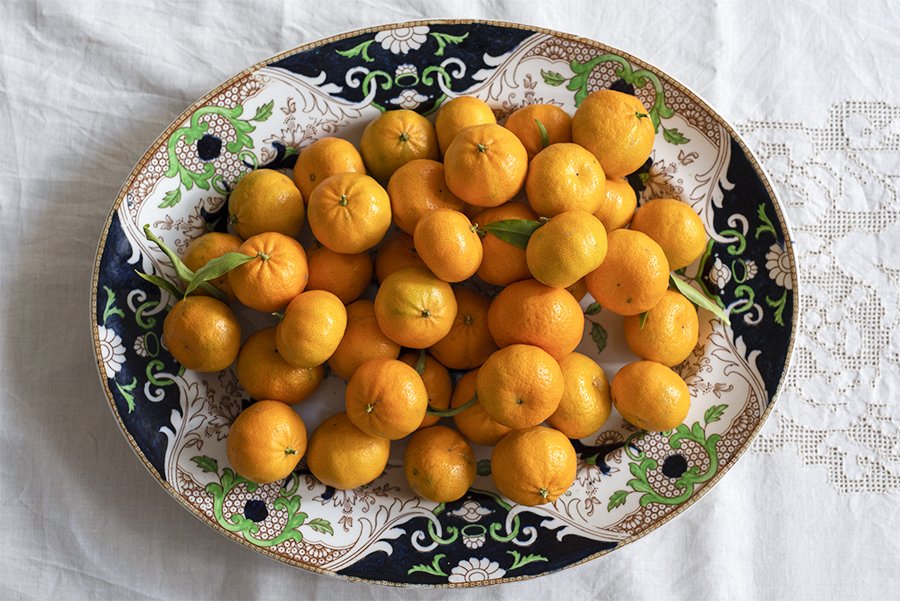
Winter heralds citrus fruit season. Although you can find oranges most of the year (as they store well in cold rooms) and lemons, mandarins are usually missing in action. The Imperial varieties are my favourites and it is a bonus when there are no pips. This deliciously moist cake is made with whole boiled mandarins and almonds, so happens to be gluten free. I love the combination of chocolate and orange, I add chocolate pieces to this cake – though you could easily omit these if you like.
Winter heralds citrus fruit season. Although you can find oranges most of the year (as they store well in cold rooms) and lemons, mandarins are usually missing in action. The Imperial varieties are my favourites and it is a bonus when there are no pips. This deliciously moist cake is made with whole boiled mandarins and almonds, so happens to be gluten free. I love the combination of chocolate and orange, I add chocolate pieces to this cake – though you could easily omit these if you like.

Mandarin, almond and chocolate cake
350g mandarins (about 6 small ones)
100g almond meal*
100g hazelnut meal*
5 eggs
1 heaped tablespoon flour (GF if making gluten free)#
1 tsp baking powder (GF if making gluten free)
big pinch salt
150g sugar
70g dark chocolate, chopped into small pieces
(*NB. or you can use 200g almond meal)
(# I used Ardor Food Co gluten free flour)
Place the washed mandarins in a saucepan of cold water. Bring to the boil and simmer covered for about an hour. Drain, chop in half and allow to cool on a colander (make sure you catch the juice).
Preheat the oven to 150C fan. Line and sides and base of a 23 cm spring-form tin.
Remove all the pips from the cooled mandarins and discard. Place the remaining mandarin pieces (skin, pith, juice and all) in a food processor and blend until a smooth puree forms. Add the eggs, almond/hazelnut meal, sugar, flour, baking powder and salt and blitz until combined. Stir in the chocolate pieces.
Pour into the prepared tin and bake for about an hour or until it is firm to touch, golden and a skewer inserted comes out clean. Allow to cool in the tin.
Serve on its own or with thick Greek yoghurt. You can dust with icing sugar just before serving if you like. Lasts 4 days in a lidded container placed in a cool spot. I keep it in the fridge, it is lovely to eat cold or at room temperature..