RECIPES

lamb shanks braised in red wine
One of the most rewarding things to do in winter is to cook a hearty meal for family and friends, and then sit down and share the meal with them. I am not a big meat eater but I do love the occasional slow-cooked dish and this is a favourite. If you don’t have time to finely chop the onion, carrot and celery for the soffritto, you can use a food processor, though if you do, it helps if you cut the carrot into slices first and quarter the onions. The carob gives a lovely chocolatey depth to the dish and the cardamom is spicy and so wintery. The dish is lovely served on a bed of soft polenta or potato mash.
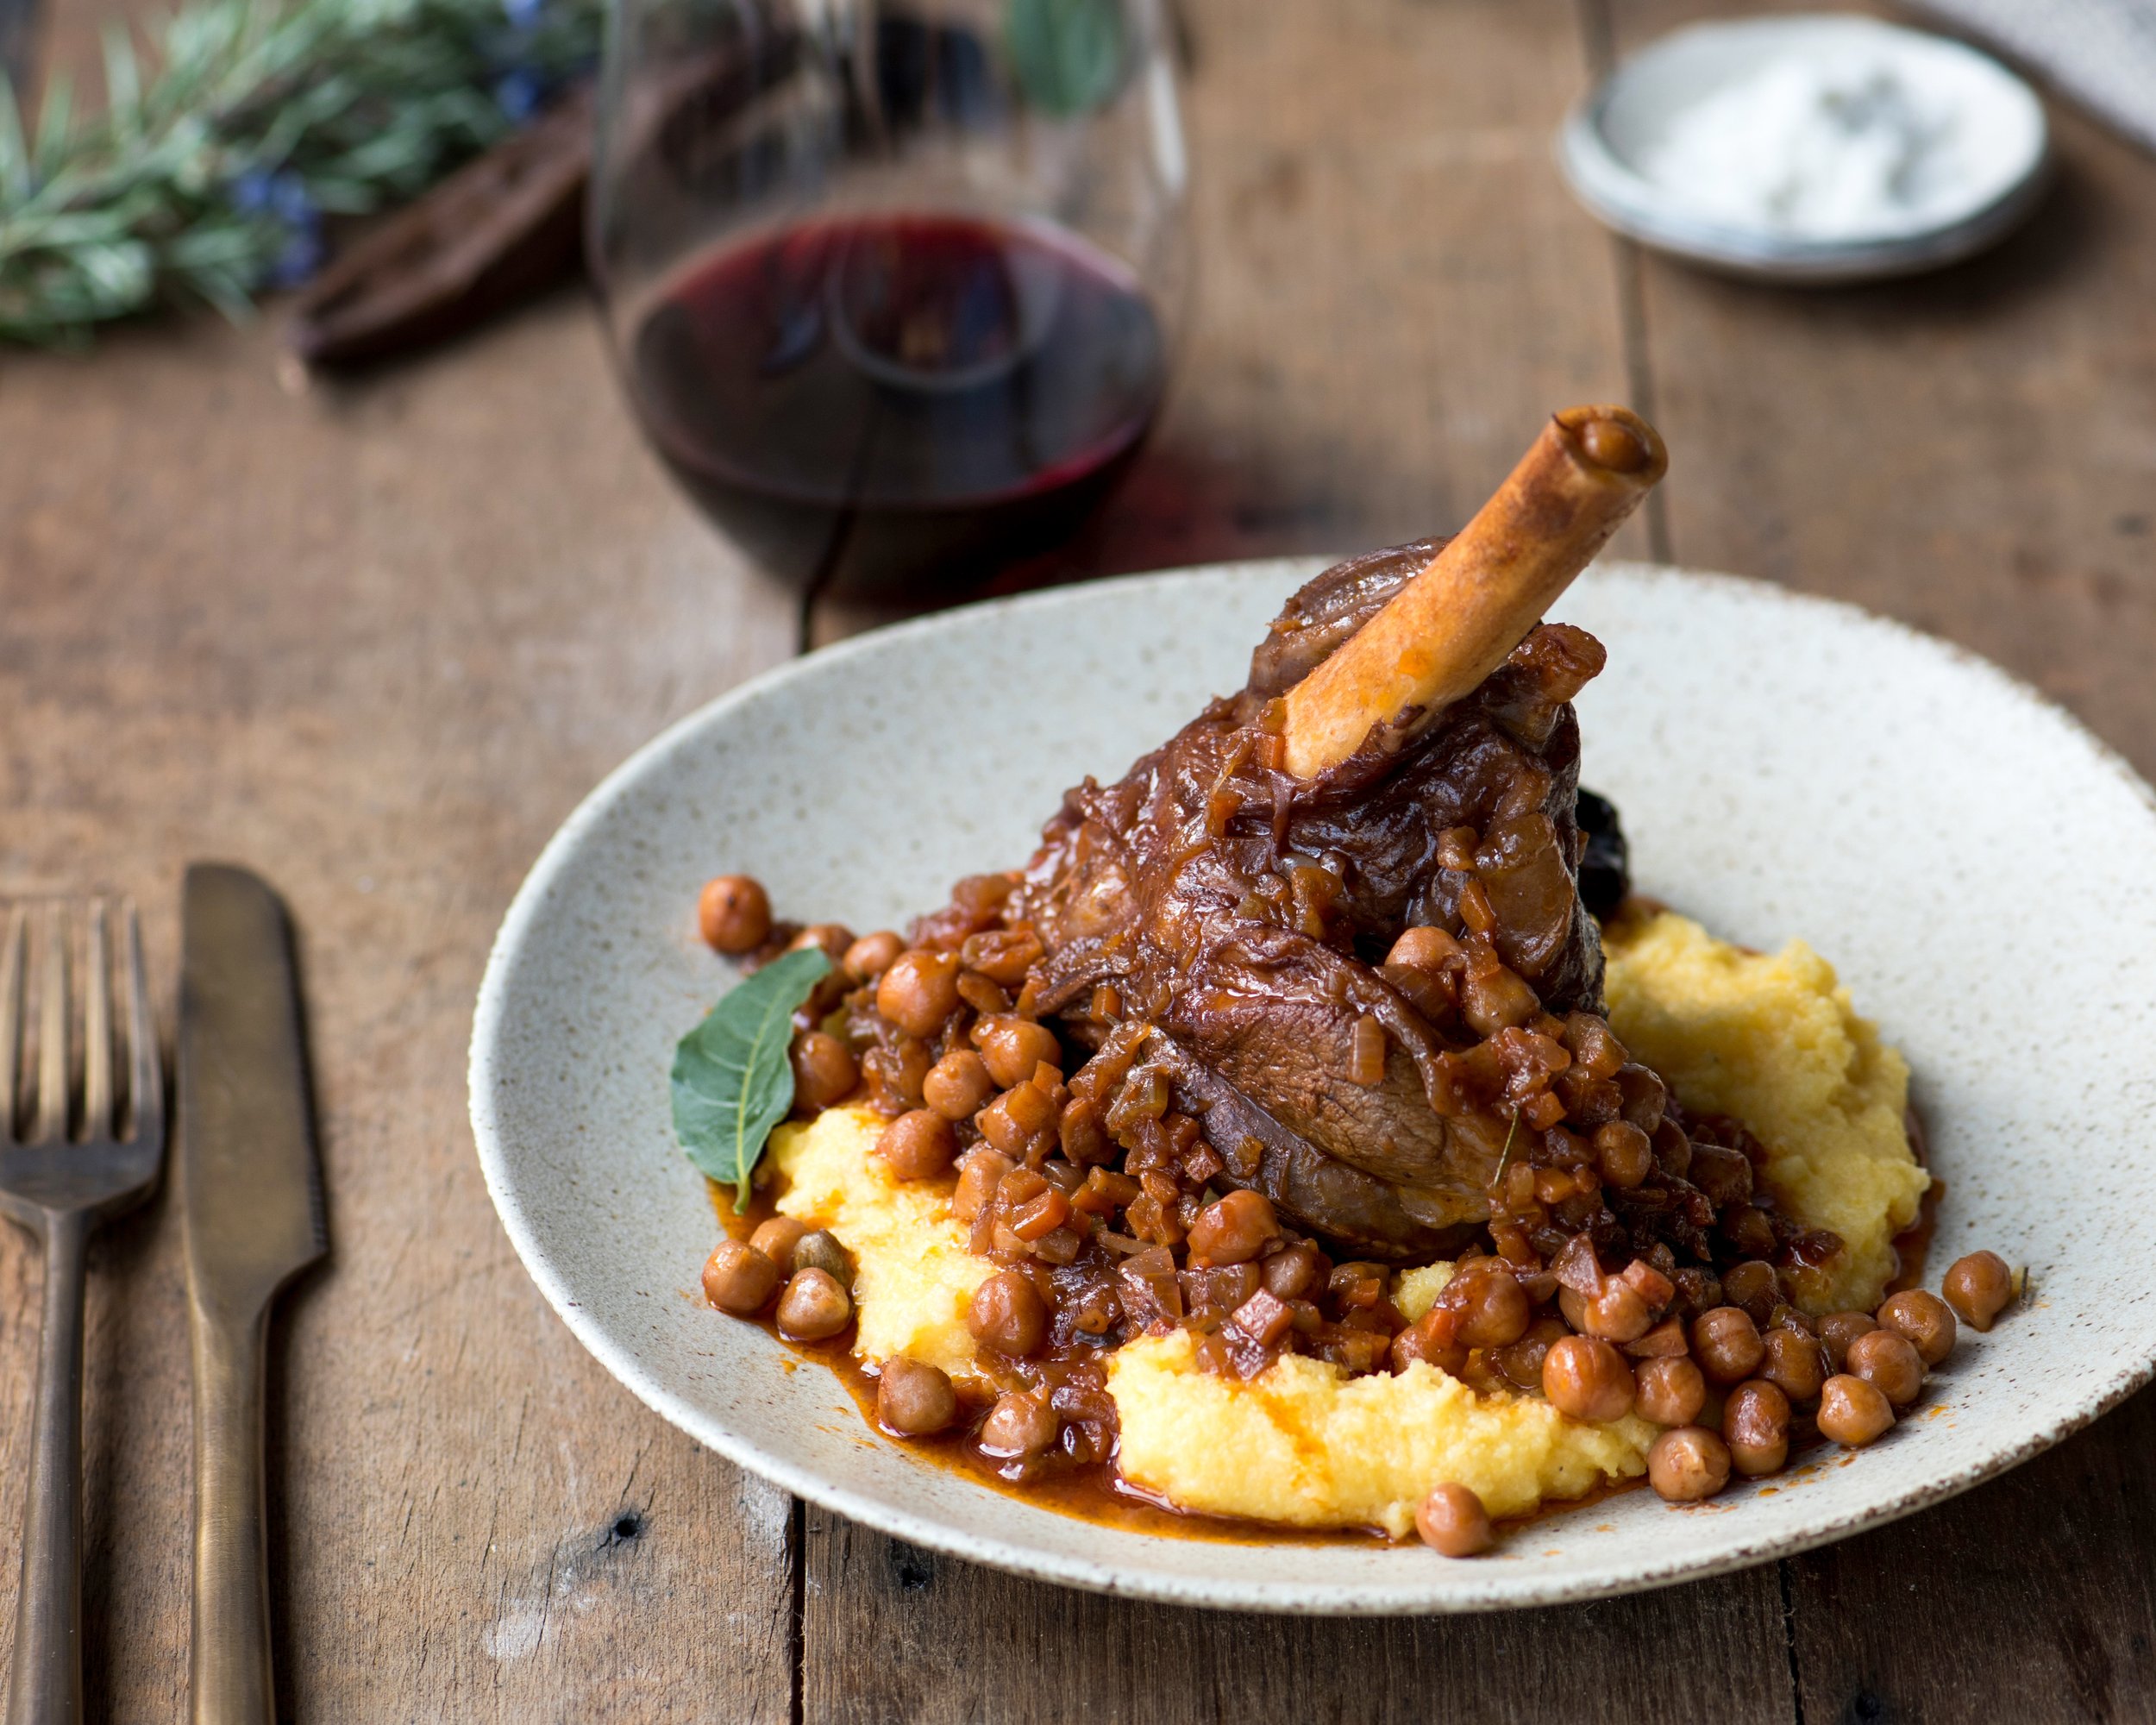
One of the most rewarding things to do in winter is to cook a hearty meal for family and friends, and then sit down and share the meal with them. I am not a big meat eater but I do love the occasional slow-cooked dish and this lamb dish is a favourite. It can be quite a show-stopper for a dinner party. If you don’t have time to finely chop the onion, carrot and celery for the soffritto, you can use a food processor, though if you do, it helps if you cut the carrot into slices first and quarter the onions. The carob gives a lovely chocolatey depth to the dish and the cardamom is spicy and so wintery. The dish is lovely served on a bed of soft polenta or potato mash (with a glass of fine cabernet if you love wine).
lamb shanks braised in red wine
4 lamb shanks (about 500g each)
1 small onion, peeled
1 small carrot, peeled
½ half stalk celery
¼ cup extra virgin olive oil
4 cardamom pods, crushed
1 stalk rosemary
2 small bay leaves
1 carob pod
2/3 cup red wine
½ cup port
3 tablespoons tomato concentrate
2 cups tinned chickpeas, drained (about 1 and a ½ tins)
Finely dice the onions, carrots and celery and place in a large heavy bottomed lidded saucepan with the extra virgin olive oil. Cook about ten minutes on low to medium heat until the onions are translucent. Add the lamb shanks and turn the heat up to medium, browning them on all sides for about 5 minutes. Add the crushed cardamom pods, carob pod (broken into several pieces), bay leaf and rosemary stalk. Stir though then add the red wine, the port and the tomato concentrate dissolved in a couple of tablespoons of boiling water. Stir and then cover the pot with a lid.
Allow the lamb shanks to simmer for about an hour on low heat, turning them over regularly. After an hour add the chick peas, stir and then cover the pan, allowing the dish to simmer for another half an hour until the lamb is cooked through, making sure you turn the shanks over every now and then. Taste and adjust for salt then serve.

ricotta gnocchi with peas, fava beans and mint
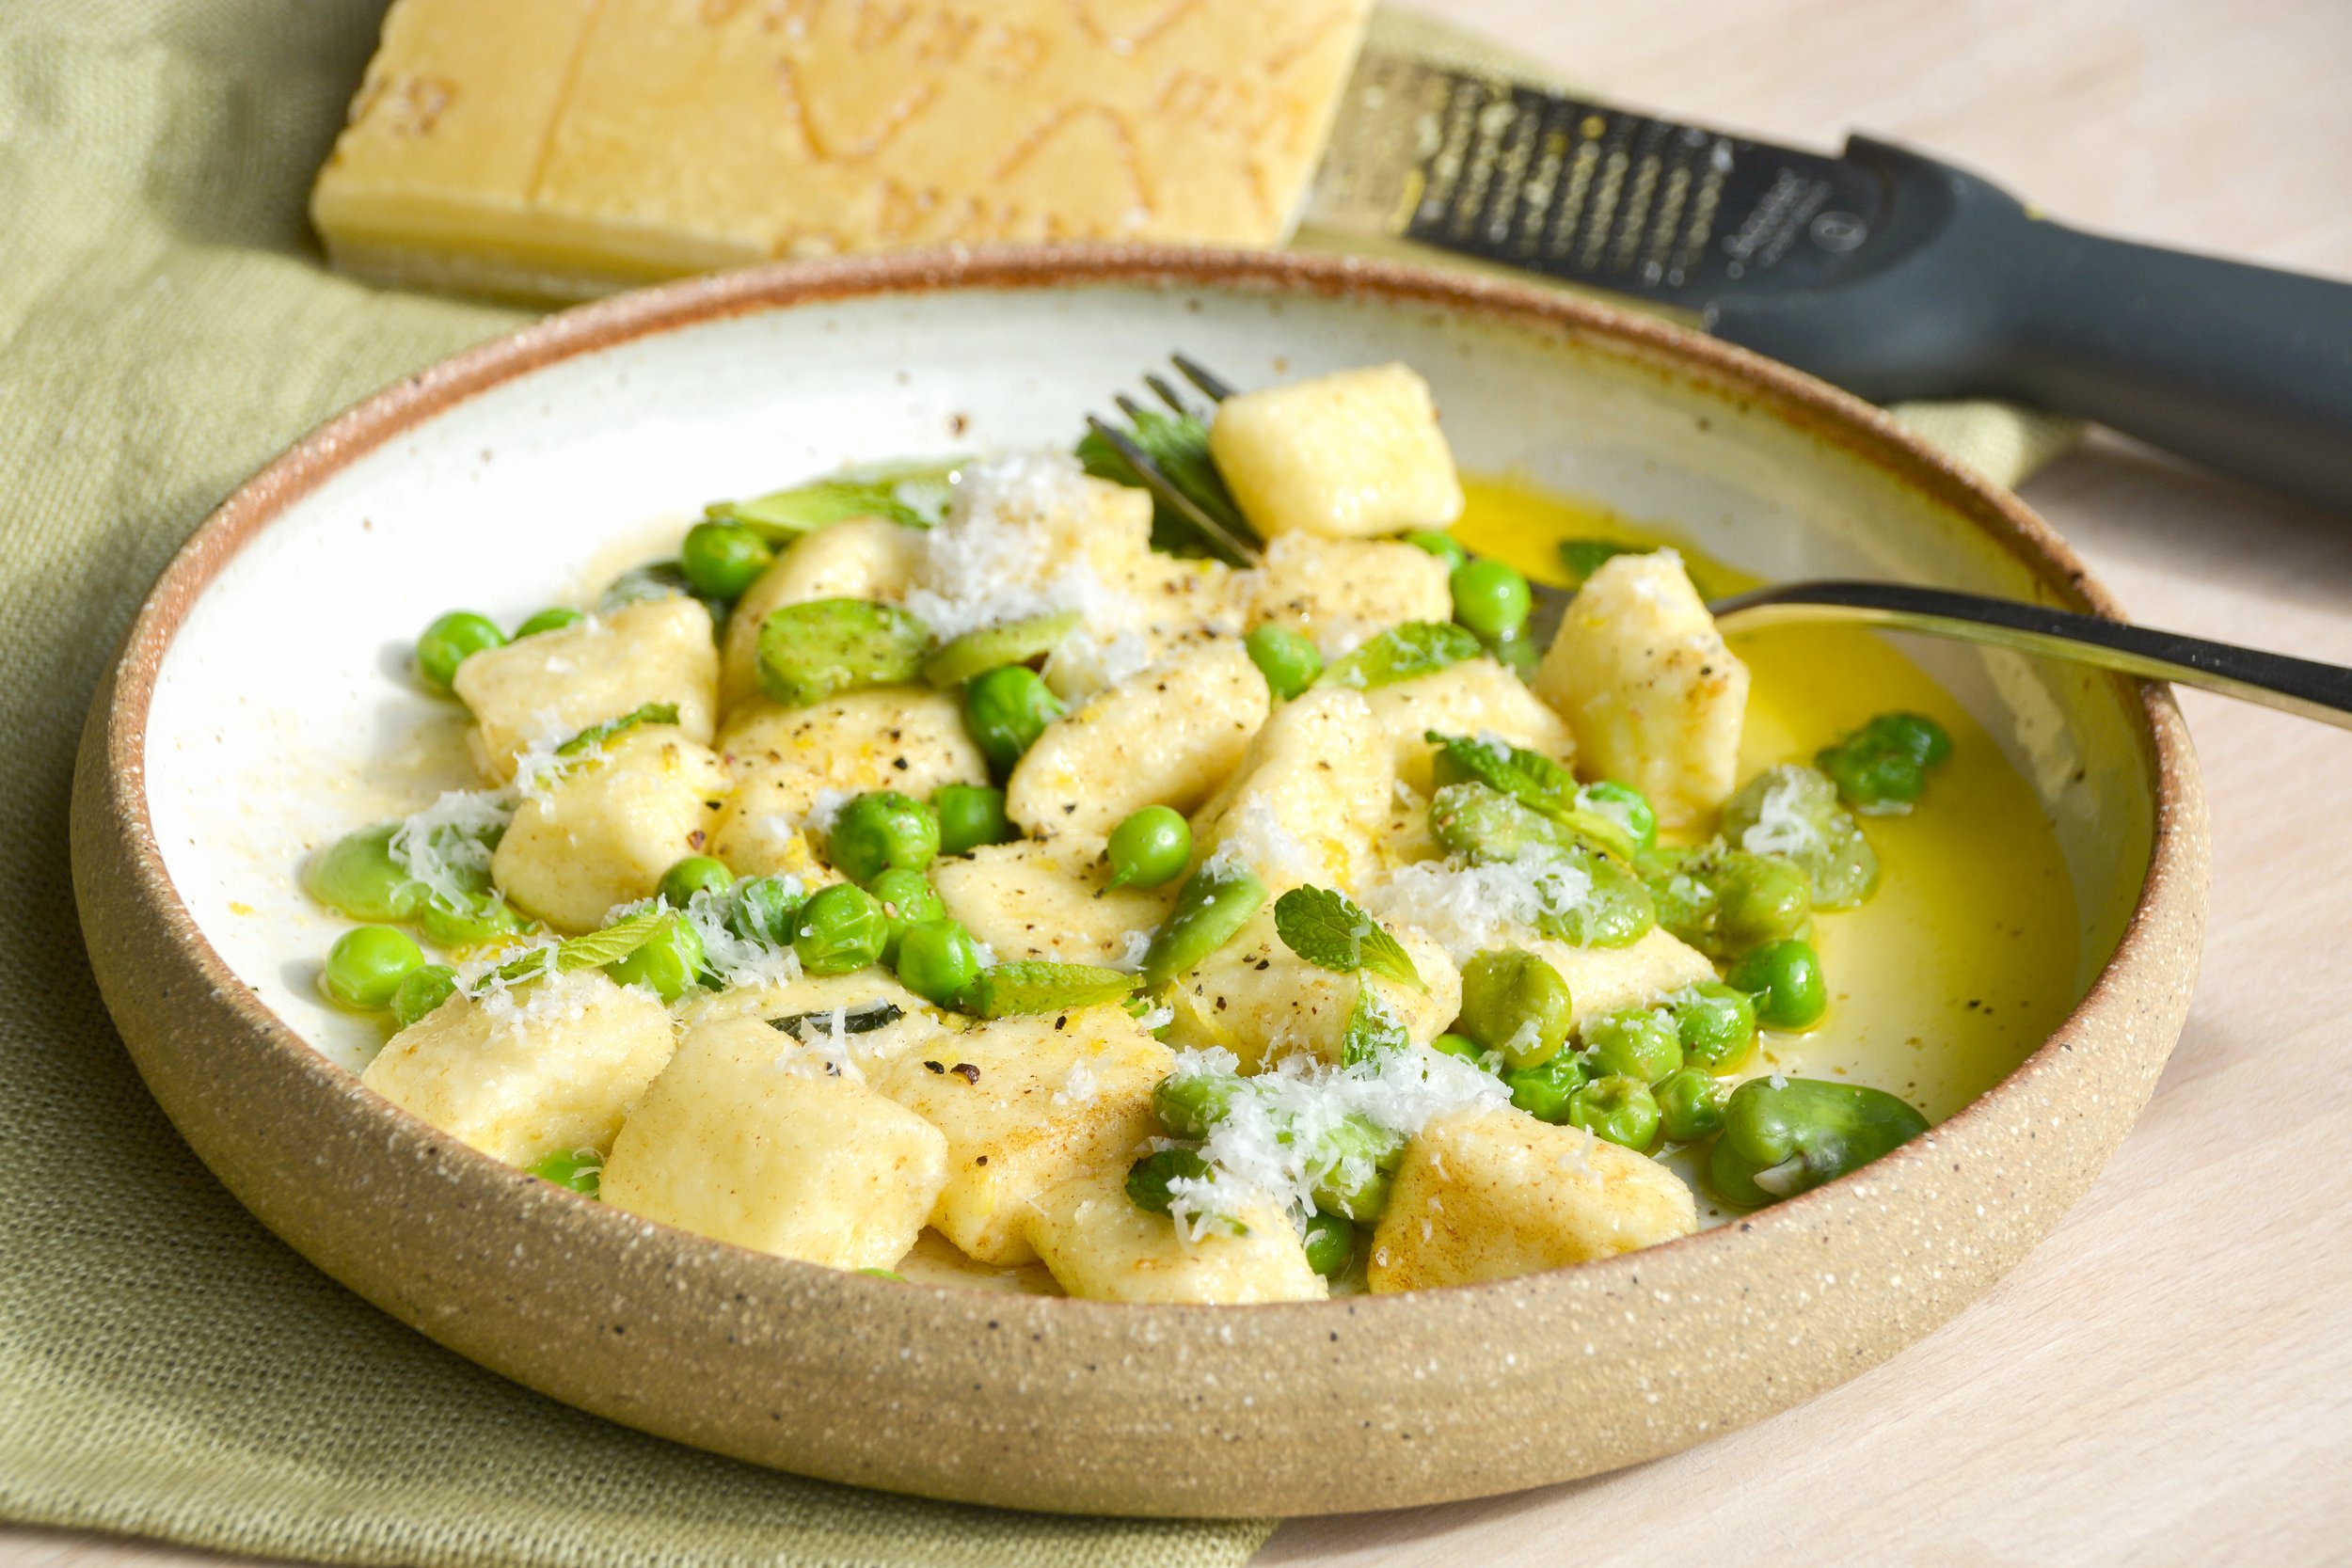
What a joy it is to find fresh peas and fava/broad beans at the market! It heralds the start of Spring when trees start to bud and the air is lighter and happier. I love podding beans. It is so relaxing. I put on jazz or a podcast and sip on herbal tea as I pod away, a few sweet green jewels finding their way into my mouth. I especially love the “pop” the peas. Fresh peas and fava beans so lovely on their own but I love to marry them with pasta or gnocchi, fresh herbs and cheese. They sing out Spring and the warmth in the air even more.
What a joy it is to find fresh peas and fava/broad beans at the market! It heralds the start of Spring when trees start to bud and the air is lighter and happier. I love podding beans. It is so relaxing. I put on jazz or a podcast and sip on herbal tea as I pod away, a few sweet green jewels finding their way into my mouth. I especially love the “pop” the peas. Fresh peas and fava beans so lovely on their own but I love to marry them with pasta or gnocchi, fresh herbs and cheese. They sing out Spring and the warmth in the air even more.
I love this combination with ricotta gnocchi. I first made them following the recipe by Fabrizia Lanza in her cookbook “Coming home to Sicily”. Fabrizia is a beautiful soul. I had the privilege of running a couple of 5-day workshops at her famed cooking school in central Sicily in 2016 and 2017. What a joyful and memorable time that was….sigh, I miss Sicily. If you have never heard of Fabrizia or been to the Anna Tasca Lanza Cooking School (where everything you make and eat is grown locally and made from scratch), you can find out more here. It should seriously be on every foodie’s bucket list.

In the meantime, the recipe below is based on Fabrizia’s recipe. It serves 3-4 people and is lovely and light. And very pretty as well.
ricotta gnocchi with peas, fava beans and mint
450g ricotta, well drained
1 large egg
3 - 4 tablespoons plain flour
2 - 3 tablespoons parmesan cheese, grated (plus extra to serve)
1 egg, lightly whisked and mixed with
fine semolina, for dusting
100g butter, unsalted
a couple of handfuls each fresh podded peas & fava/broad beans handful baby mint leaves 1 small lemon, zest only (optional)
To make the gnocchi place the ricotta and egg in a bowl and mash with a fork until creamy. Add flour and parmesan and stir; the mixture will be quite soft but should stay together. Place a handful of the mixture on a working surface that has been well dusted with the semolina and roll into a long rope. Cut into pieces 2-3 cm and roll in more semolina. Repeat with remaining ricotta mix and set aside, spaced out and covered in a clean tea towel.
Double pod the older/larger fava beans by plunging individual beans in boiling salted water for a minute; then drain and remove the outer pod. Blanch the peas and smaller/younger fava beans in salted boiling water for a minute, then drain.
Place a large frying pan on the stove on low to medium heat and melt the butter.
Bring a large wide pot of salted water to the boil and cook the gnocchi in batches, draining them with a slotted spoon as the rise to the surface and placing them in the large pan with the melted butter.
Gently toss the cooked gnocchi in the butter and scatter on the peas and fava beans until warmed through. Serve topped with mint leaves, extra grated parmesan and lemon zest.
Tomato and parmesan tarts
I miss the tomatoes my father used to grow. Dense, sweet, red fruit hung on dozens of vines that were well over 170cm in height. He would prop them up with old wooden stakes that he would retrieve in late spring from the locked cubby hole under the back stairs where they had sat since last summer. He would hammer them in to the earth using a large mallet, tying up the growing vines with strips of old fabric, remnants of mamma’s old sheets. There they would grow, straight and tall, helped along by his expert pruning. You could smell the tomatoes growing from the back door of the house, the sweet and herbaceous scent of summer.
I miss the tomatoes my father used to grow. Dense, sweet, red fruit hung on dozens of vines that were well over 170cm in height. He would prop them up with old wooden stakes that he would retrieve in late spring from the locked cubby hole under the back stairs where they had sat since last summer. He would hammer them in to the earth using a large mallet, tying up the growing vines with strips of old fabric, remnants of mamma’s old sheets. There they would grow, straight and tall, helped along by his expert pruning. You could smell the tomatoes growing from the back door of the house, the sweet and herbaceous scent of summer. Between the tomato stalks, papà would plant leafy basil bushes, telling me they brought out the best in each other not only on the table but in the garden. My favourite summer meal was a toss up between pasta puttanesca, made using freshly picked tomatoes and torn basil and insalata Caprese, layering fresh mozzarella with slices of tomato and basil leaves and dousing the lot with good quality olive oil.

Papà would grow his tomatoes from seeds, planting them around October and keep them in a small hot house in the brick paved part of the garden. He would look after them carefully, watering them with a miniature watering can and make sure they were in the best position to catch the Spring sun. He would label each of the seedlings and then plant them in the garden once they were 8-10 cm tall. One year he had decided to grow cherry tomatoes, which were much easier to manage as they did not need staking. Much to his surprise one of the plants grew yellow fruit, small elongated ones. Papà treated them with some suspicion, as he was sure that the seeds were meant to produce red tomatoes. We left them on the vine, ignoring the sweet yellow fruit as a curious mutant. I too was surprised - I thought all tomatoes were red (much like all carrots are meant to be orange). Of course this was in the days before heirloom fruit and vegetables became common place.
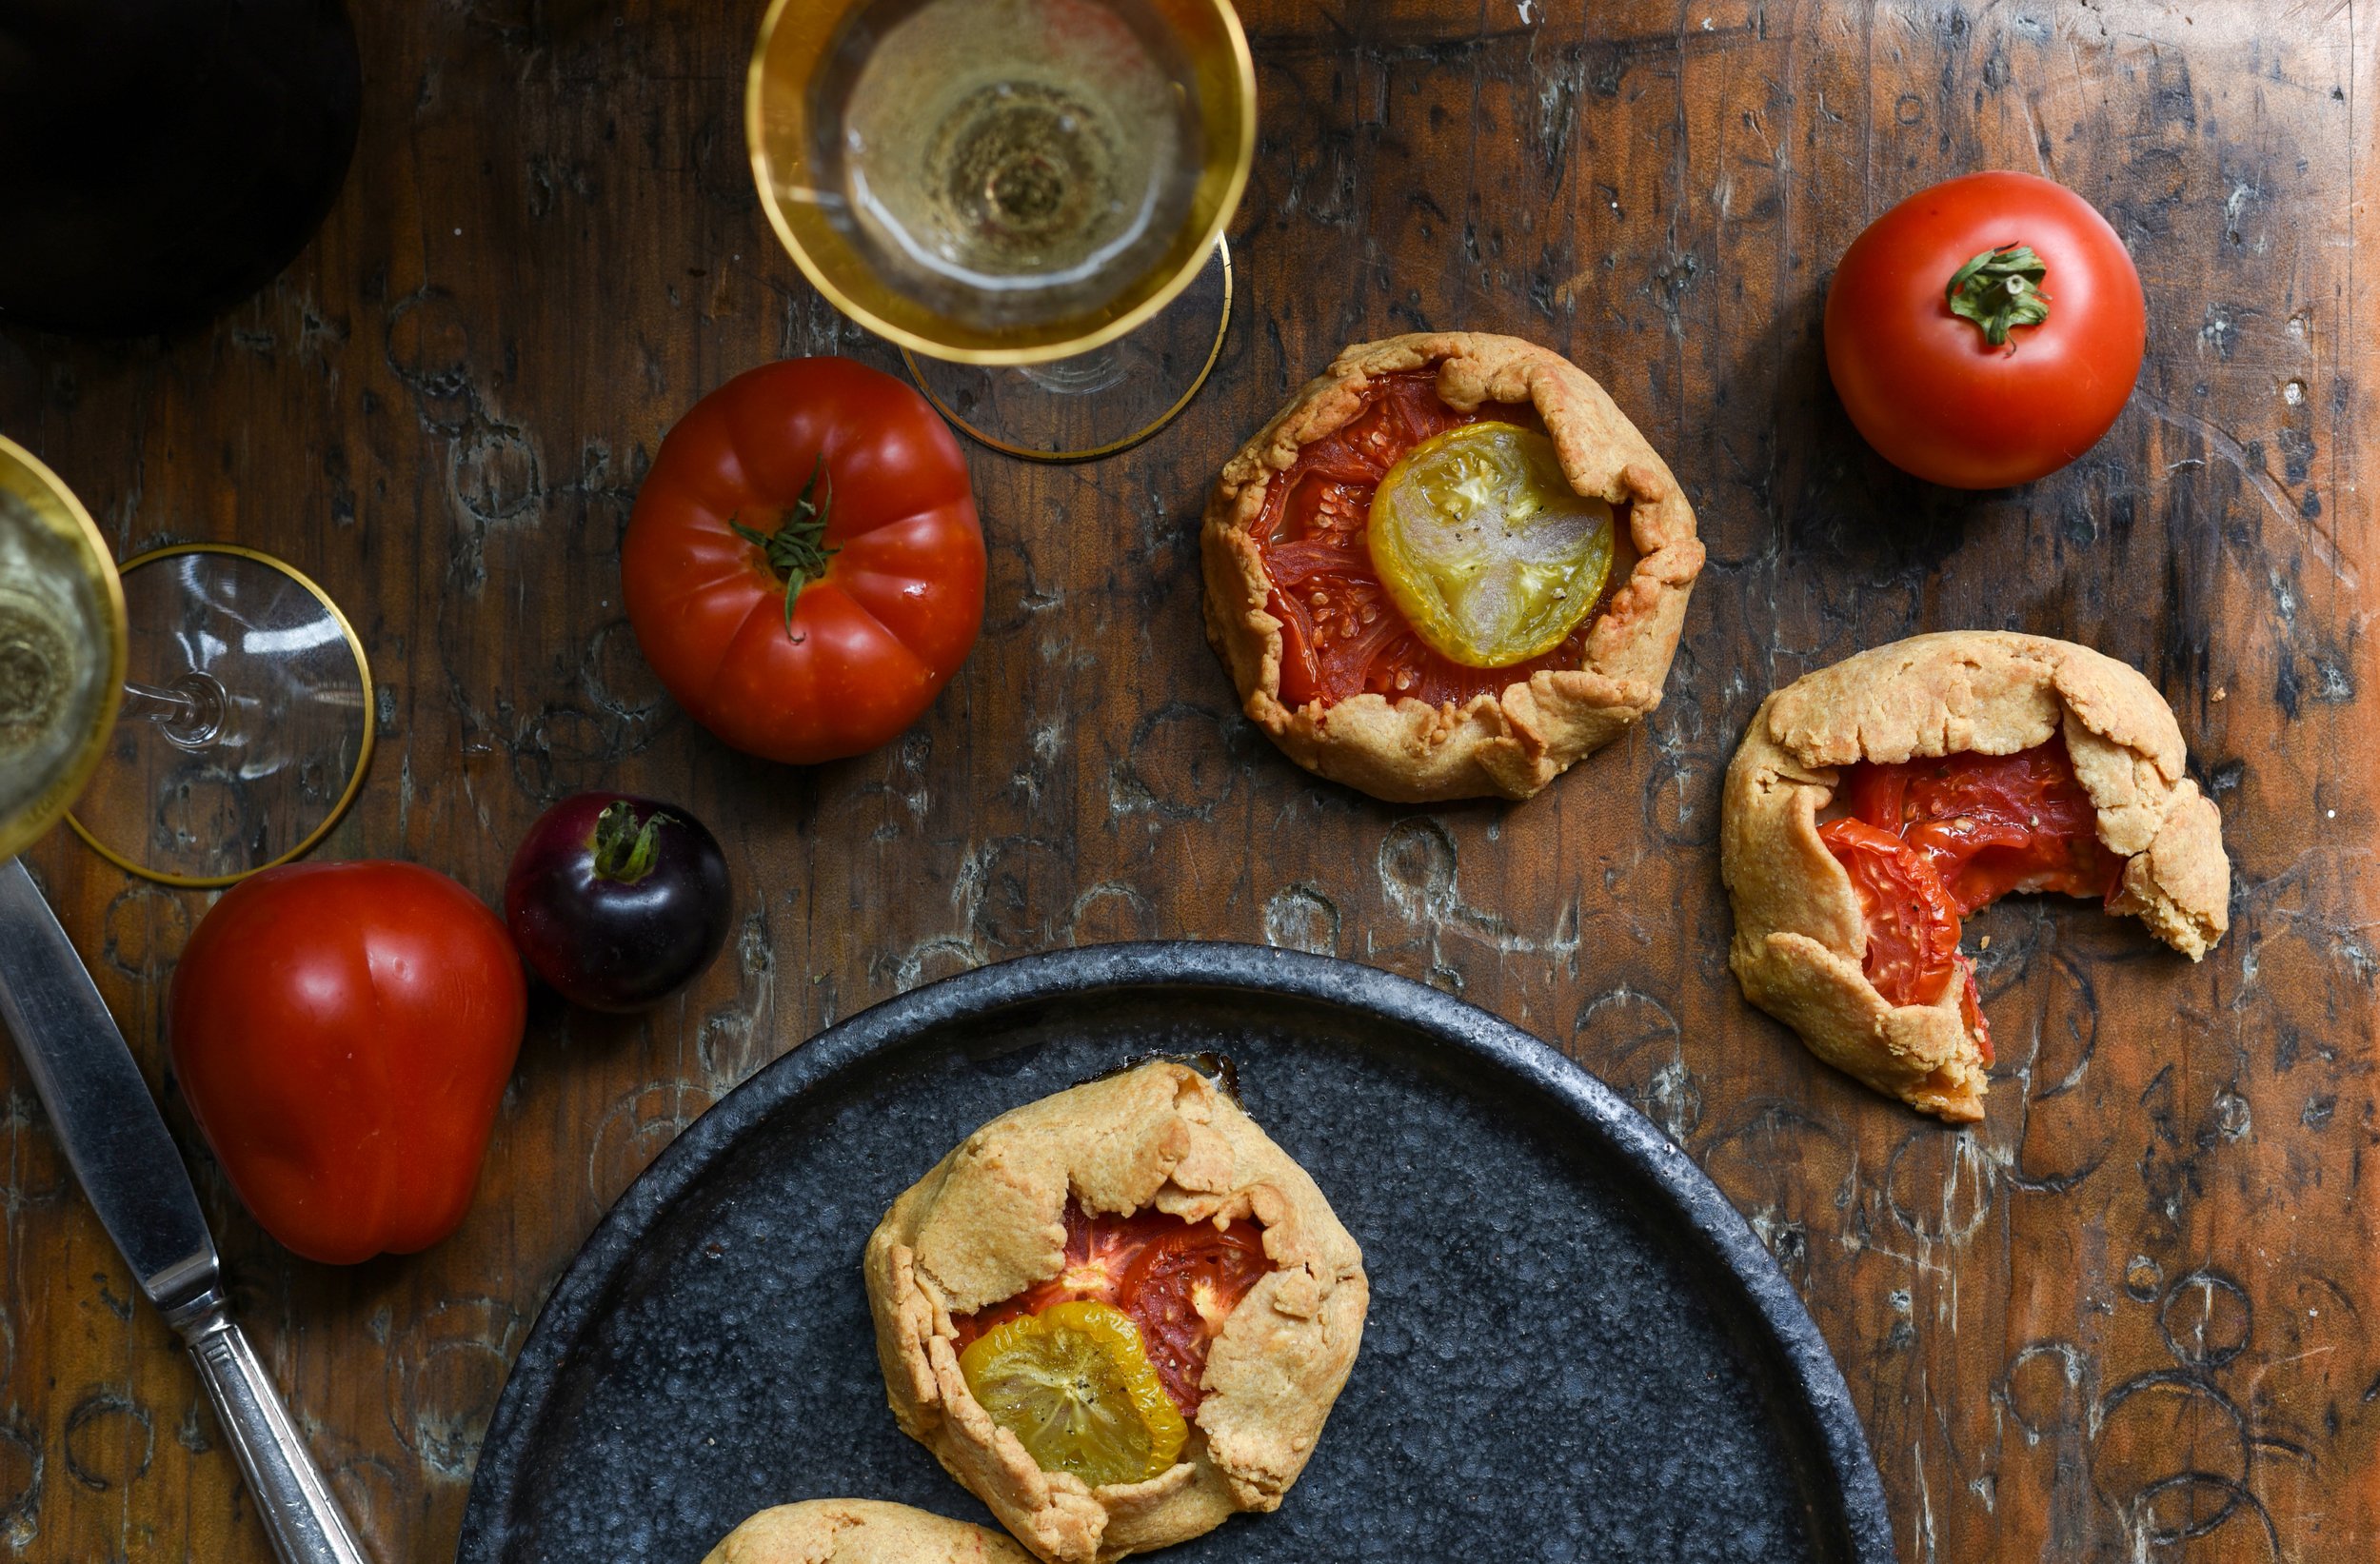
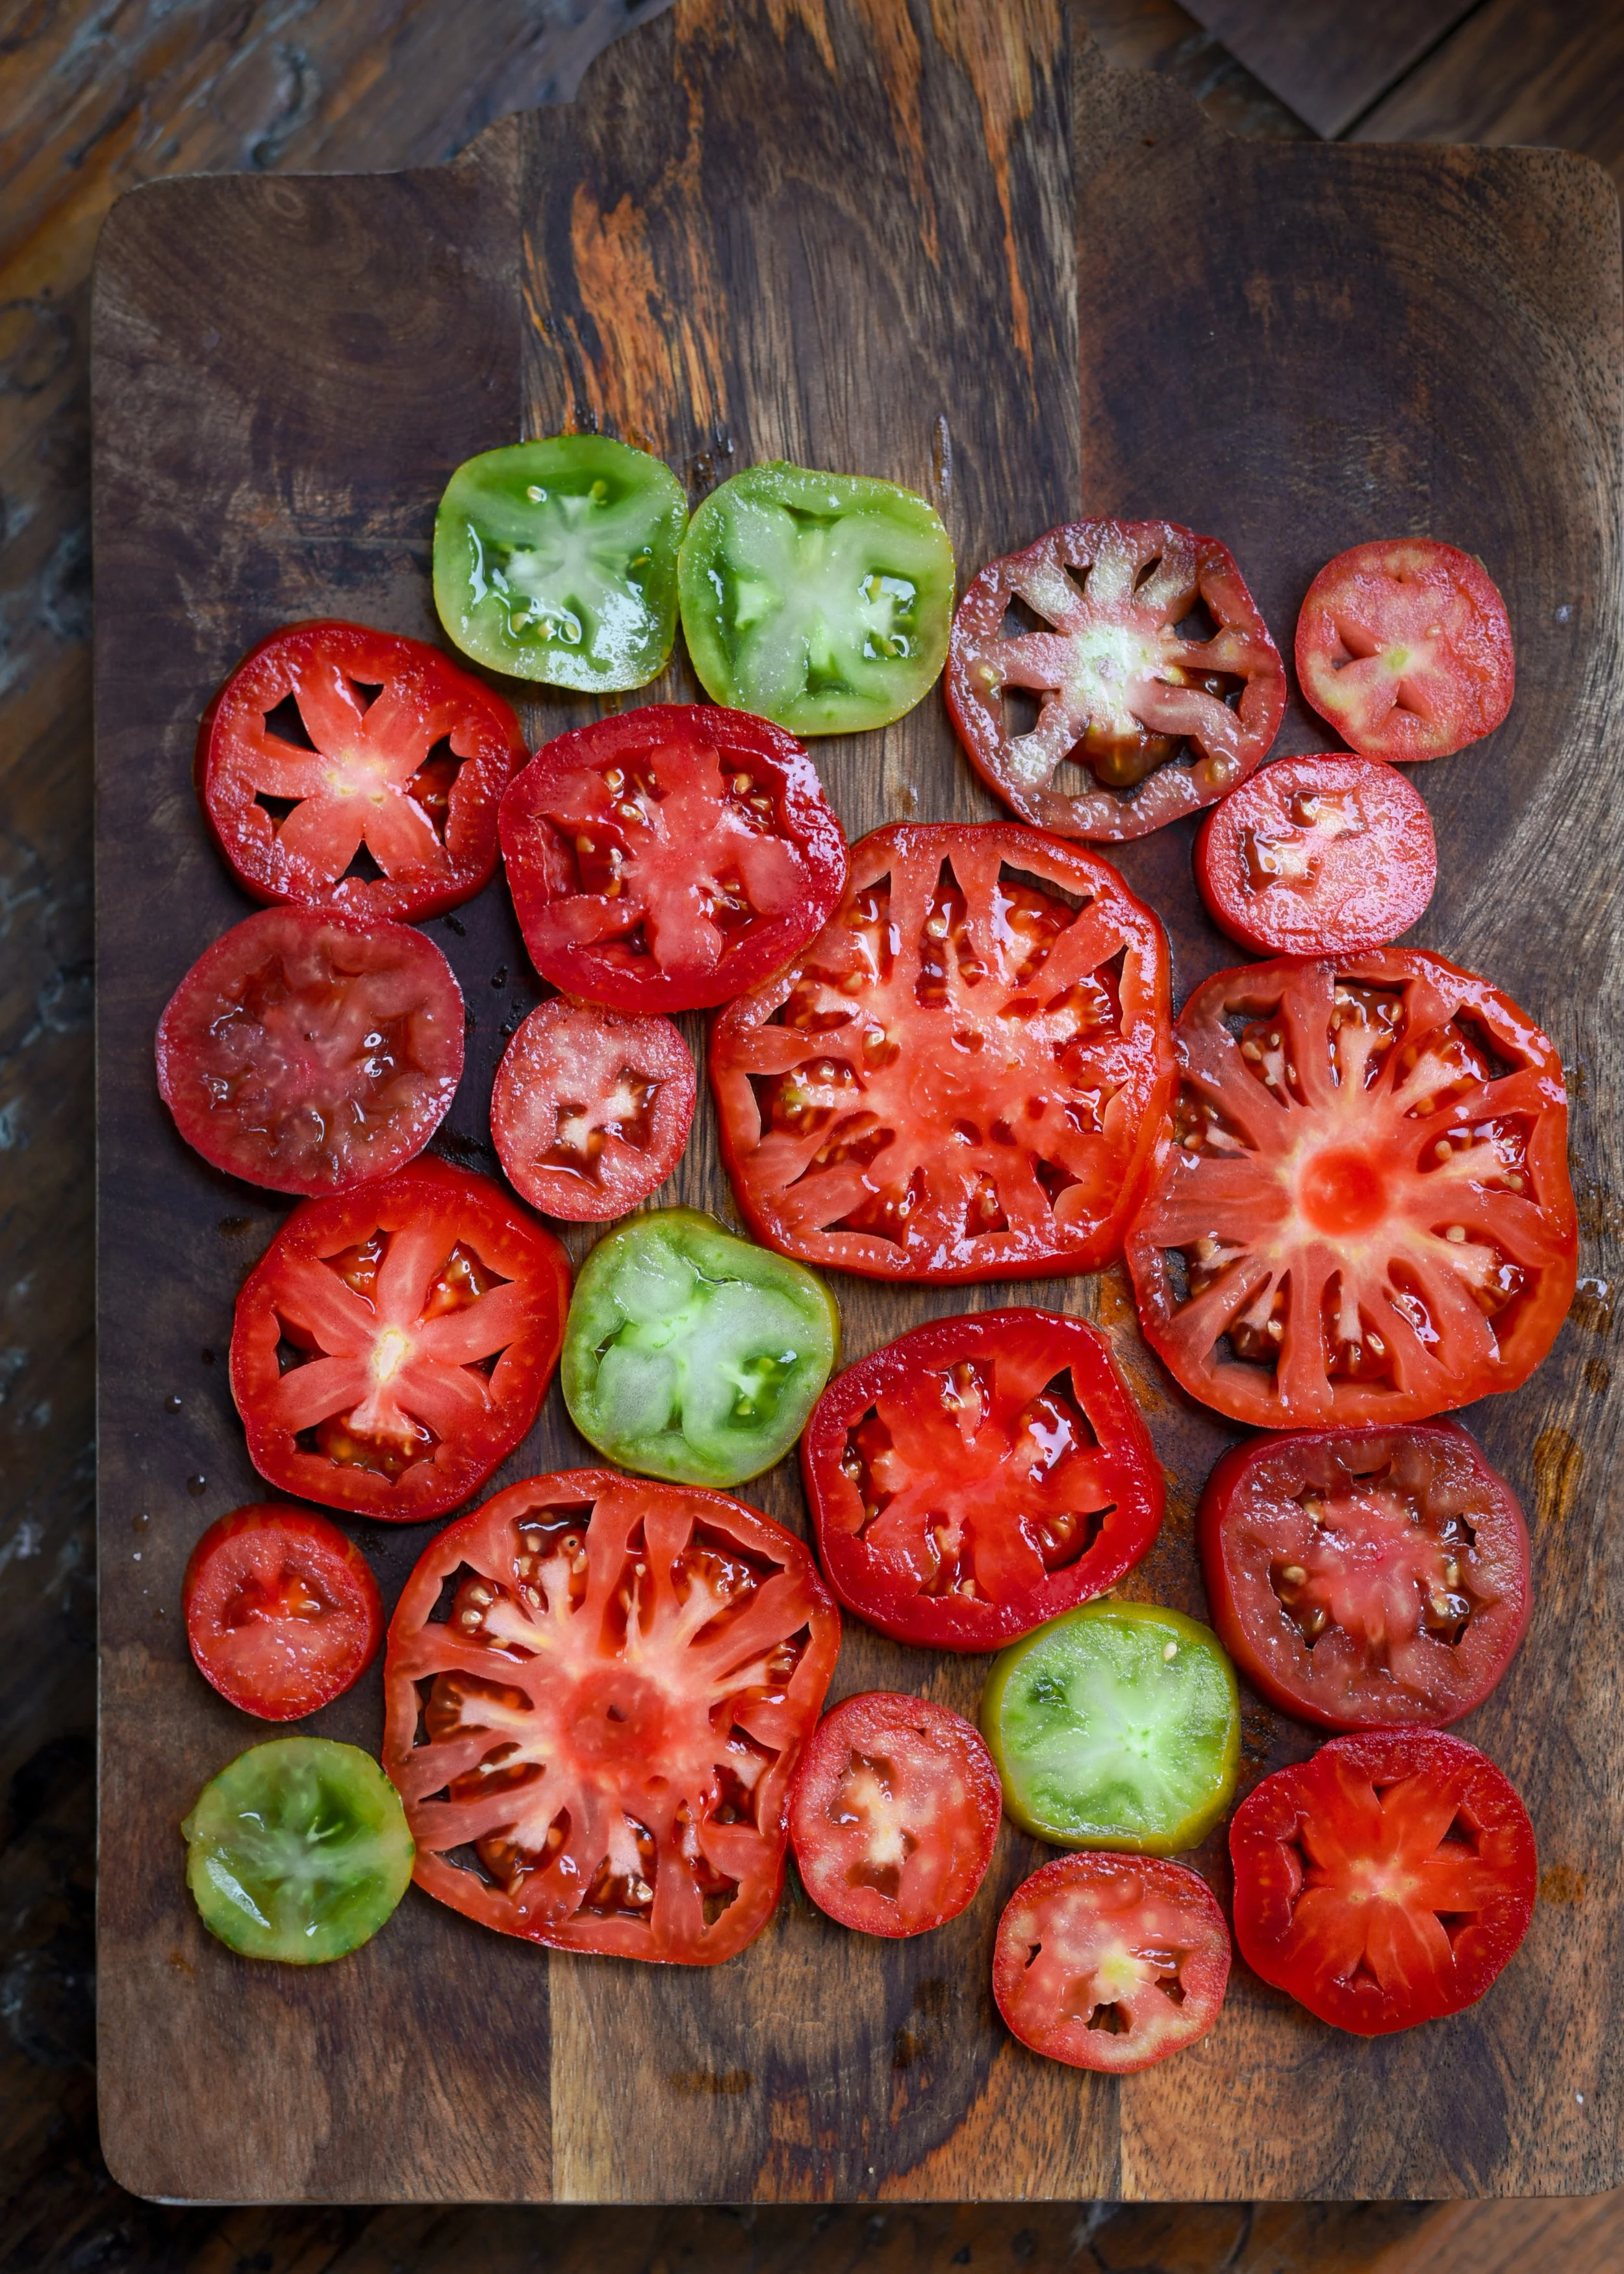
I love that we can now so easily find a variety of tomatoes: purple black, green, yellow and striped in all sorts of shapes and sizes. They look so colourful in the fruit shop I have been known to buy a lot more than I need. And the taste is very good, though I must admit to always being slightly disappointed. They taste good, amazingly good in comparison to hot-house tomatoes you buy in winter, but not quite as good as the backyard tomatoes of my memory. Or maybe it is just the nostalgia of those plump, sweet homegrown tomatoes, eaten at our family table with my father proudly looking on.

Last week was one when I bought a box of colourful heirloom tomatoes, well in excess of what I needed. I ate them in salads, sliced on toast, with buffalo mozzarella every day. I also turned several into very rustic hand pastries (called that because you can easily hold one in your hand); I wrapped up slices of tomato with buttery short crust pastry made with spelt flour. I added some grated parmesan to the dough, that gave it a lovely saltiness that worked well with the robust spelt flour. You could easily use white flour (or wholemeal) or a combination of flours; the pastries will probably look less rustic (read: neater) than mine. But they made lovely appetisers; the naturally sweet in season tomatoes are so tasty. I could imagine taking these to a late summer picnic to share with friends; holding a tomato pastry in one hand and a glass of Prosecco in the other. I wonder what my papà would say, if confronted with a green tomato on a pastry. I am pretty sure he would have got over his suspicion of non-red tomatoes and enjoyed it very much.
Tomato and parmesan tarts
Makes 6
170g flour (I used unbleached spelt flour)
1/4 tsp salt
20g parmesan cheese, grated (I used Grana Padano)
90g unsalted butter, cold and diced
1 small egg, cold from the fridge, lightly beaten with a fork
1-2 tsps cold milk (if needed)
2 large in-season tomatoes
black pepper, freshly cracked to taste
Place the flour, parmesan cheese and salt in a large bowl and give it a quick whisk to combine. Crumble the cold butter into the flour with your fingertips, working quickly so it does not melt, until it resembles wet sand. Add the egg, and bring the dough together. Add a little bit of milk if needed for the dough to clump together into a mass. Divide into six equal pieces and flatten them into discs with the palm of your hand.
You can either put the discs, covered in cling film in the fridge, or else roll them out quickly into large circles (10cm diameter) with a rolling pin. Place a layer of cling film between each of the discs, cover and then refrigerate for 30 minutes.
Preheat the oven to 180C and line a baking tray with baking paper. Cut your tomatoes into slices about 3-4 mm thick and set aside. Remove the pastry from the fridge, and roll them out into circles, about 10cm in diameter (if you have not done so already). Place the pastry circles on the tray, well spaces, and place a couple of slices of tomato on each circle. Carefully fold the sides of the circle inwards so that they partially cover the tomato slices.
Bake for 30 minutes or until the pastry is cooked through and the tomatoes are softened. Allow to cool to room temperature, and scatter on cracked black pepper and salt flakes to taste before serving.
Tarts will last for a few days covered in the fridge.

pear and blue cheese ravioli
It felt like autumn today. It was wet, windy, people at the market were wearing their jackets again after a long hot summer and somehow it felt just the way it should. I have really been looking forward to autumn this year. It has been incredibly humid and mosquitoes have found me particularly attractive, especially at night when I hear them buzzing around me, waiting to attack.
It felt like autumn today. It was wet, windy, people at the market were wearing their jackets again after a long hot summer and somehow it felt just the way it should. I have really been looking forward to autumn this year. It has been incredibly humid and mosquitoes have found me particularly attractive, especially at night when I hear them buzzing around me, waiting to attack.
The market today did not disappoint my wintery outlook - it was full of autumnal fruits and vegetables: parsnips, cauliflowers and pears. As much as I love summer stone fruit, beautifully ripe Williams pears called me today and I bought a big bag, thinking I might make a pear and chocolate cake. But once I had got home, the cold weather made me crave pasta. I have been so busy since the start of the year taking photos for my cookbook (which is all about street food with no pasta dish in sight), I suddenly realised that the last time I had made pasta at home was November last year.


Once I had made up my mind to make a pasta dish, the rest was easy. Pears and blue cheese are a match made in heaven and as long as you can make pasta, this dish is easier than you think. The filling is literally just blue cheese, a bit of cream and pears cooked in butter for 5 minutes. The sauce is simple - just a bit of melted butter. You could also top the whole dish with some roughly chopped toasted walnuts or drop a couple of sage leaves in the buttery sauce.
This one is a lovely warming dish for an autumn evening, with a glass of buttery Chardonnay and some bitter greens, pan fried with garlic and drizzled with olive oil and lemon juice on the side.
PEAR AND BLUE CHEESE RAVIOLI
serves 4 as an entree (makes 18 ravioli, at 8cm diameter)
for the pasta:
200g 00 durum wheat flour
2 large eggs
for the filling:
2 ripe Williams or Packham pears (230g peeled and cored)
10g unsalted butter
125g creamy blue cheese (sweet Gorgonzola or Blue Castello)
2 tablespoons thickened cream
salt and pepper to taste
semolina flour for dusting
100g unsalted butter (for the sauce)
extra freshly ground pepper
To make the pasta, put the flour in a mound on your work surface and make a well in the centre. Break open the two eggs into it and either using your finger tips or a fork, gradually incorporate the flour until it is all mixed in to the eggs. Knead until smooth (around 5 minutes). Form a ball with the dough, wrap in cling film and allow to rest for at least 30 minutes (a couple of hours is fine).
In the meantime, make the filling. Peel and core the pears, chopping them into small dice. Place them with 10g butter in a small pan and cook on medium heat for about 5 minutes until soft. Remove from the heat and allow to cool.
Place the blue cheese and cream in a mini-processor and process until smooth. Place in a bowl and add the cooled pears, fold through until homogeneous and add salt and pepper to taste. Set aside.
Divide the dough in two, keeping one piece wrapped in cling film while you work on the other one. Make the pasta by running it through your pasta machine until it is the desired thickness (I ran it through to the fourth thinnest setting “6” on an Atlas pasta machine).
I used an 8 cm diameter ravioli cutter to make my ravioli. Place heaped teaspoons of filling on your pasta sheet. Wet your finger with water and run it around the filling before folding the pasta onto itself so that the little mounds of filling are completely covered by pasta. Push down around the filling so that the pasta is well sealed, taking care not to trap air into the raviolo. Use your ravioli cutter to make circle around the filling where you have sealed the pasta. Lightly dust the ravioli with semolina flour. Repeat, keeping the prepared ravioli covered by a clean teatowel as you make others so they do not dry out.
Place a large pot of well-salted water on the stove and bring to the boil. Drop in the ravioli when the water boils and cook until al dente (mine took 6-7 minutes).
Whilst the ravioli are cooking, put 100g of unsalted butter in the pan (I use 25g per person) and heat until melted. Drop the well drained, cooked ravioli in the melted butter and toss for a minute or two so they are well covered in melted butter. Serve immediately with a bit of freshly ground pepper on top and sea salt flakes to taste.

Radicchio tart
I adore red radicchio not only for its vibrant colour but for its bitter flavour. I qualify it with the “red” as radicchio can also be green, yellow, white or pink and is part of the chicory (cicoria) family. The “radiceto” that I grew up eating is actually called “cicoria zuccherina di Trieste” or sweet chicory from Trieste, a sweet leafy salad green that grows progressively bitter as the plant matures.
I adore red radicchio not only for its vibrant colour but for its bitter flavour. I qualify it with the “red” as radicchio can also be green, yellow, white or pink and is part of the chicory (cicoria) family. The “radiceto” that I grew up eating is actually called “cicoria zuccherina di Trieste” or sweet chicory from Trieste, a sweet leafy salad green that grows progressively bitter as the plant matures. There are many varieties of red radicchio: Treviso, Chioggia, Verona (all names of towns in Veneto); the leaves of the head of the radicchio of the three varieties are a different shape and they have differing degrees of bitterness.
Here in Melbourne the red radicchio I can more easily find looks like the round Chioggia variety, and it is just labelled “radicchio”. My favourite red radicchio is one I cannot find in Australia - radicchio rosso di Treviso Tardivo, with thick central white spines and distinctive curls at the tips of the leaves. It is called “tardivo” because it is found in late winter.


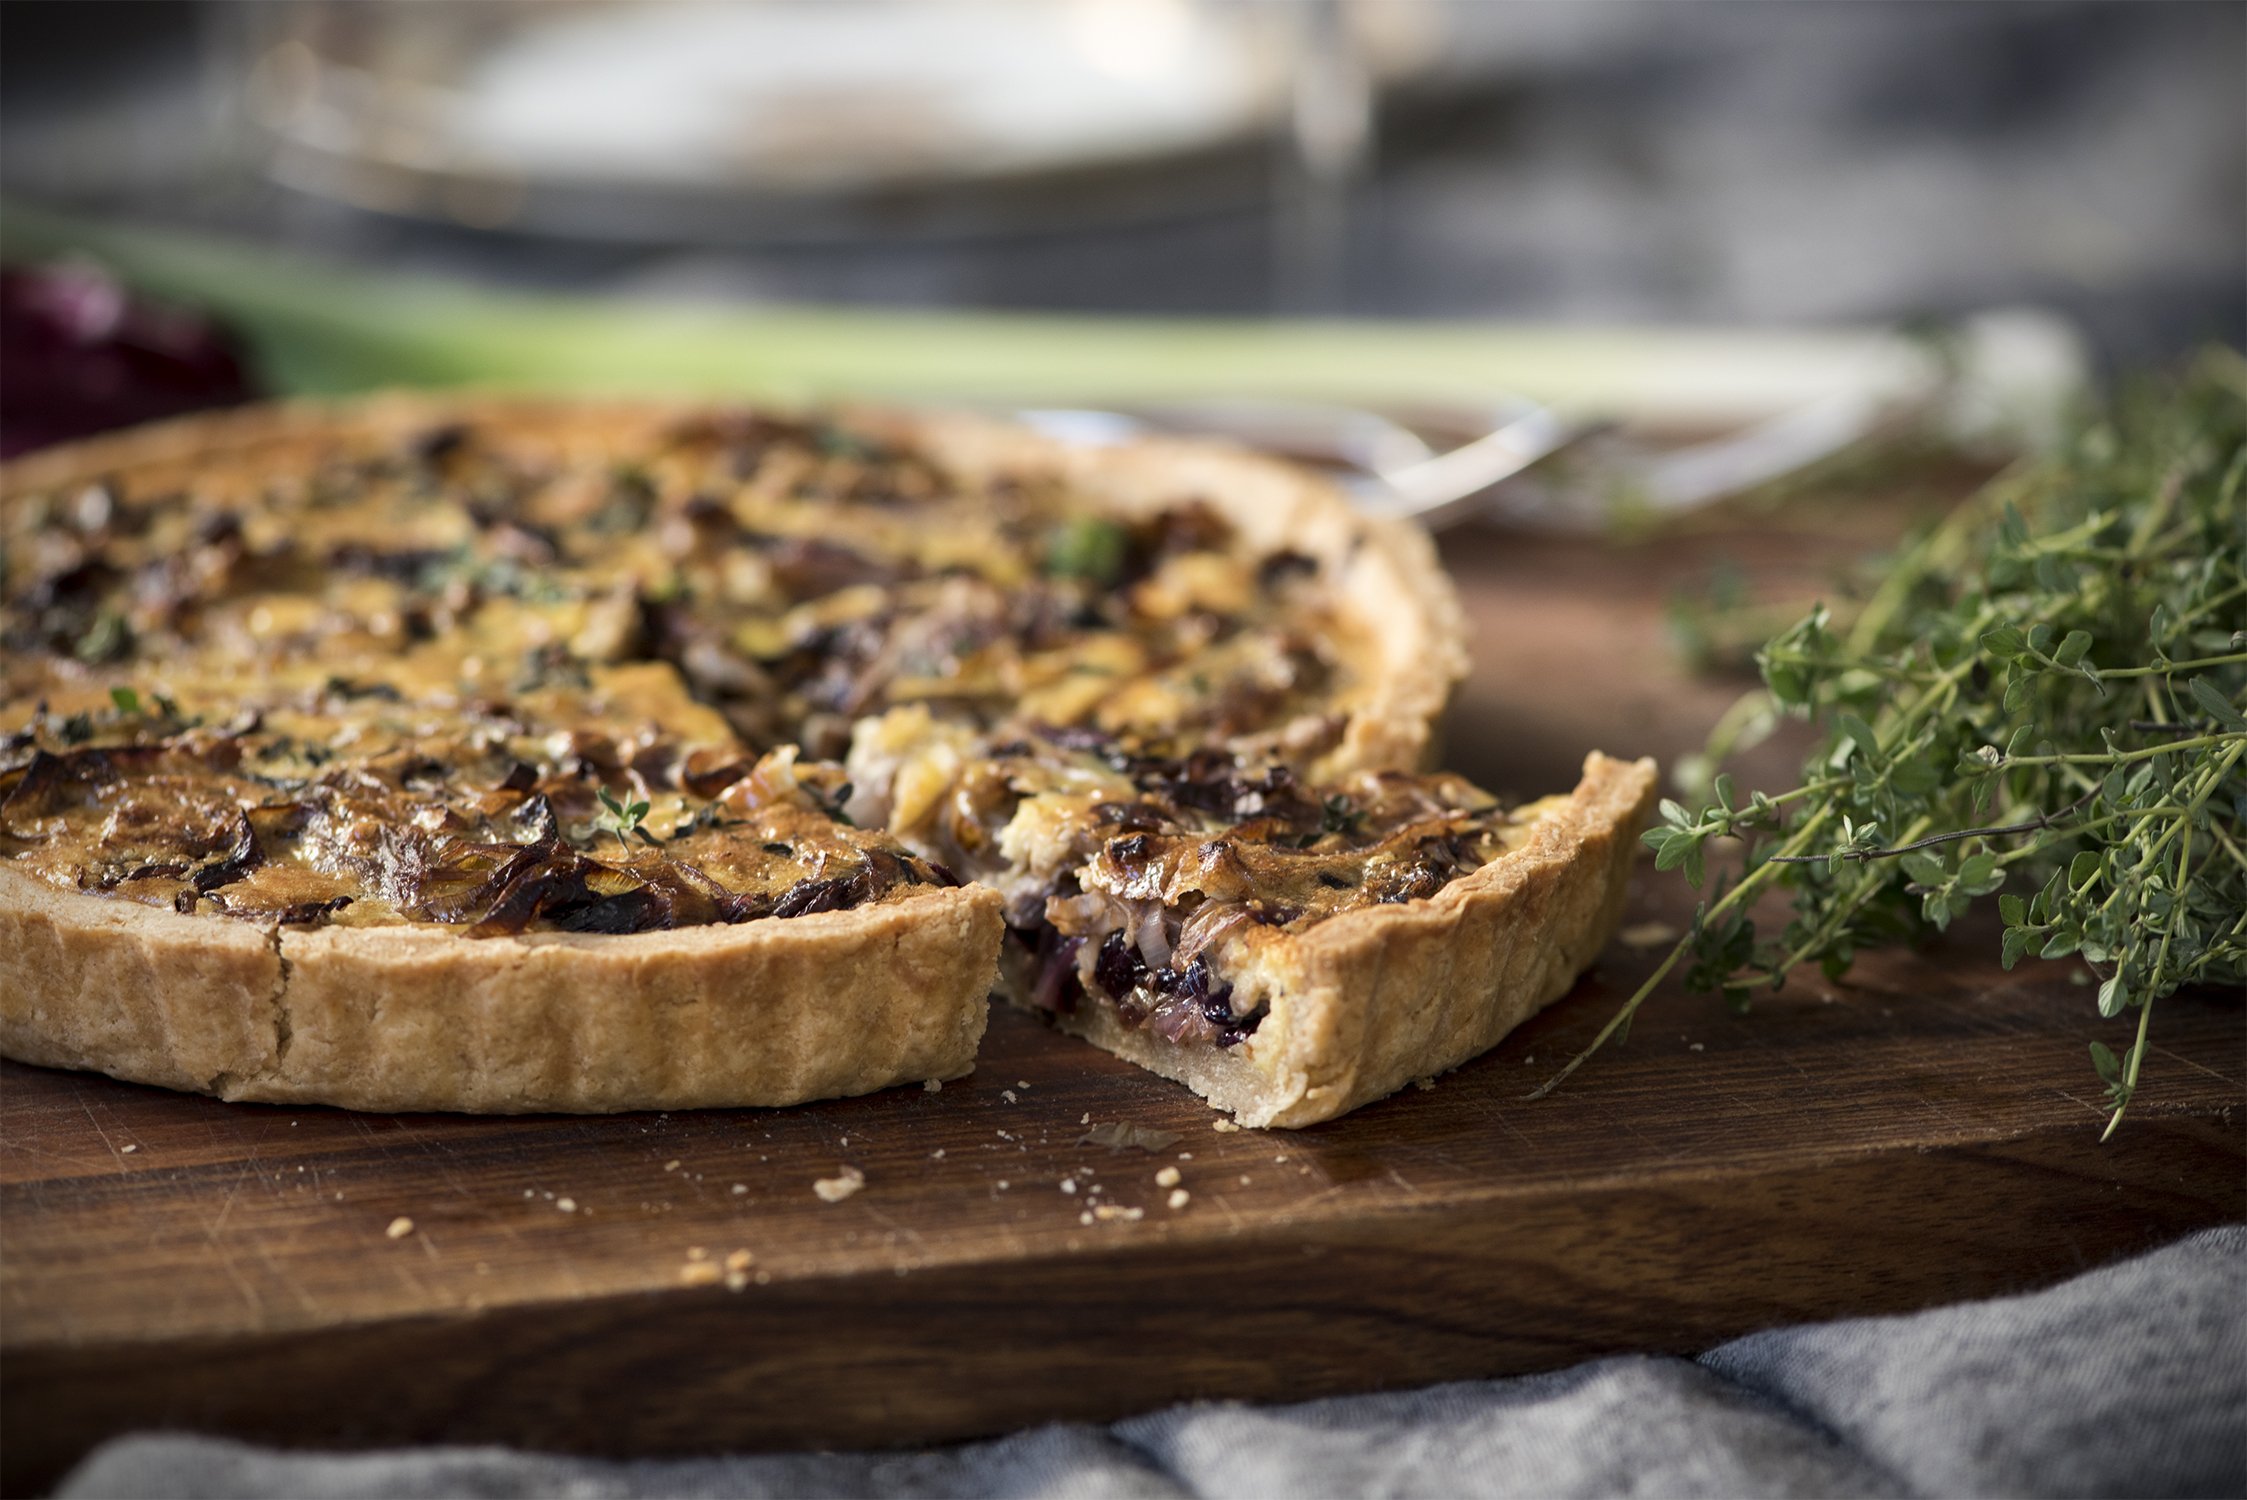
In winter I always have a head of radicchio in the fridge. I love eating it in a salad (with some thinly sliced ripe pear) but also making a risotto with it (and using red wine with the stock), or grilling it (and drizzling it with aged balsamic vinegar) or making it the hero of the filling in a vegetarian tart.
Using store-bought shortcrust pastry makes this tart much quicker to make, though I like making my own using half spelt flour and half plain and it gives it a slightly nutty taste. I have played around with the tart filling a bit, adding more or less balsamic vinegar and brown sugar, to balance the bitter/sweet/acid tastes. If you find radicchio too bitter, soaking it in water (for up to a couple hours) will remove the bitterness, and in this case you may like to reduce or omit the sugar (the balsamic vinegar is a bit sweet anyway). The tart has a lovely balanced taste and makes a lovely Sunday night dinner and cold leftovers are perfect the next day.

radicchio tart
FOR THE PASTRY:
150g unbleached white spelt flour
150g plain flour
125g unsalted butter, cut into small dice and cold from the fridge
1 large egg
1/4 tsp salt
3-4 tablespoons milk or water, cold from the fridge
(or you could use 450g store-bought shortcrust pastry)
FOR THE FILLING:
2 small leeks
1 head red radicchio
2 tablespoons extra virgin olive oil
15g unsalted butter
2-3 tablespoons white wine
1 tablespoon balsamic vinegar
1/2 – 1 tsp brown sugar
100g cream or plain yoghurt
2 eggs
25g parmesan, grated
1 tsp thyme leaves (plus extra for garnish)
To make the pastry, place the flours and salt in a large bowl and whisk to remove lumps. Add the butter, working it into the flour with your finger tips until it resembles wet sand. You could also use the pulse function on your food processor to do this step. Drop in the lightly beaten egg and two tablespoons of the milk, mixing with a wooden spoon (or your processor) to bring it all together. Eventually you will need to use your hands to shape it into a ball, adding the extra milk if needed. Knead briefly to make the dough homogenous then flatten it into a thick disc with the palm of your hand. Wrap and place in the fridge to rest for one hour.
Preheat the oven to 190C. Prepare a 25cm diameter pie tin (mine had a removable base) by lining the base and rubbing butter on the sides to prevent the dough from sticking. Remove the dough from the fridge and roll out so that it is about 3mm thick, and drape it over the base and sides of the tin, trimming the excess. Prick the base all over with a fork and put in the fridge for 15 minutes to chill.
Trim the ends of the leek and slice thinly; wash and drain then set aside. Separate the leaves from the radicchio head and cut away the thick white spine at the base of the leaves. Rinse then drain and cut into thin strips. You will need about 180g radicchio. Soak the radicchio leaves in water if they are too bitter for your taste, anywhere from 10 minutes to an hour.
Remove the pie base from the fridge. Place pie weights or dried beans (I used chick peas) on baking paper on the base and bake for 10 minutes. Remove the weights and bake for a further 10 minutes.
While the base is baking, sautè the leek with the oil and butter in a large frypan until starting to soften. Increase the heat, add the wine and cook for a few minutes so that most of the wine evaporates. then add the radicchio and cook for a few more minutes until reduced in volume and softened. Add the sugar and stir though, then add the balsamic vinegar. Taste the mixture, adding more balsamic or sugar if needed; then add salt to taste. Set aside to cool.
In a bowl, whisk the eggs, cream and grated Parmesan cheese, adding salt and freshly cracked pepper to taste.
Place the cooled vegetables in the pie case, making sure it is not overfilled and then carefully pour in the egg mixture. Scatter on the thyme leaves. Bake for 25-30 minutes until the filling has set and the top of the tart is golden. Garnish with fresh thyme sprigs and serve warm or at room temperature accompanied by a green salad.

Tiella cozze e riso – rice and mussel bake
It is already November, in full spring in Australia. I am dreaming - and eating - asparagus, the last of the artichokes and the first of the stone fruit (hooray). My weekly dinner at home planning looks something like this: home made pasta 4 times a week (usually egg free); one night of seafood, one night a fortnight of meat (usually beef and sometimes pork or lamb from local butcher Matt), one night of eggs and one night vegan; vegetarian for the rest. We have never eaten much meat and that is the one that often gets dropped back to once every three/four weeks. The seafood component is often tinned sardines but sometimes it is fresh sardines, mussels, flathead or clams.
It is already November, in full spring in Australia. I am dreaming - and eating - asparagus, the last of the artichokes and the first of the stone fruit (hooray). My weekly dinner at home planning looks something like this: home made pasta 4 times a week (usually egg free); one night of seafood, one night a fortnight of meat (usually beef and sometimes pork or lamb from local butcher Matt), one night of eggs and one night vegan; vegetarian for the rest. We have never eaten much meat and that is the one that often gets dropped back to once every three/four weeks. The seafood component is often tinned sardines but sometimes it is fresh sardines, mussels, flathead or clams.
I recently finished reading “On eating meat - the truth about its production and the ethics of it” by Matthew Evans. I enjoyed it hugely. I have loved seeing Matthew move to Tasmania and establish Fat Pig Farm (via the TV series Gourmet Farmer, which I have watched religiously). The book does not try to turn everyone to a vegan or even vegetarian diet, but it does give compelling facts about why you should consider where your food comes from, and make fully informed choices. It is well researched, unemotional and ponders the difficult questions about farming practices and cheap meat. I am certainly better informed about the Australian context of meat production. If you have been thinking about reading it, please do; I found it immersive and difficult to put down.


So thinking about our food, and eating sustainably, the dish I wanted to share with you in this post is a Pugliese classic: tiella cozze e riso. Mussels are nearly always farmed but are very sustainable; I buy the ones that are farmed in Mount Martha, less than an hours drive from my home (so there are not many food miles either). The word “tiella” comes from the earthenware dish in which you cook this one-pot layered meal of potatoes, tomatoes, rice, mussels and pecorino cheese (yes cheese and shellfish work surprisingly well together). Water and stock (from steaming open the mussels) are added to the pot, which is then placed in the oven to steam until it is perfectly cooked.
This is a recipe from Adriatico, and one that I have eaten often on my travels through Puglia; it is hearty and delicious especially if you are a shellfish lover.
tiella cozze e riso - rice and mussel bake
300g short-grain rice
1 clove garlic, finely chopped or minced
1 small white or brown onion, thinly sliced
600g potatoes, peeled and sliced (3-4 mm thick)
500g ripe cherry tomatoes (or other small tomato), quartered,
50g grated pecorino cheese
3 tablespoons parsley leaves
700g mussels (about 300g mussel meat)
freshly ground pepper
extra virgin olive oil
De-beard and scrub the shells of the mussels clean . Place the cleaned mussels in a large lidded frypan with a quarter cup of wine and the garlic. Cover, turn up the heat and shake the pan occasionally. After a minute, check for open mussel shells and remove them one at a time with tongs. Cover and cook for another minute and check for more open shells. Repeat for up to 5 minutes. Discard any unopened shells. Strain the liquid that is leftover in the pan and reserve. Separate the mussel meat from the shells of those that have opened at the base of the stalk using a small sharp knife. Set aside.
Preheat the oven to 200C. Drizzle a tablespoon of olive oil on the base of a round baking dish (ideally terracotta, mine was 24cm in diameter), and place a layer of potatoes. Next place a layer of onions, then a layer of tomatoes, 1 tablespoon of chopped parsley, a pinch of salt and some freshly ground pepper, some rice, then half the mussels, making sure the opening of the mussel flesh is facing up. Then add another layer of potatoes and repeat the layers described above. Finish the tiella with a layer of potatoes on top.
Fill the container with the strained cooking liquid of the mussels plus enough hot water so that it is just below that top layer of potatoes. Scatter on the cheese and bake covered (with a purpose made lid or foil) for 45 minutes. Test the potatoes with a skewer to see if they are cooked through. If they are still firm, bake for another 10 minutes. Remove the lid and bake for a further ten minutes so the top of the tiella can brown.
Rest at least half an hour before serving.

Mushroom and potato soup with cipolline onion focaccia
A common advertising line is that mushrooms are “meat for vegetarians”. Although I don’t think this is accurate where my palate is concerned they are a big part of my autumn/fall menu at home. My usual go-to recipe is risotto, but a pot of soup hits the spot in colder weather. I used a selection of wild mushrooms (Slippery Jack and pine mushrooms) but you could use any mushrooms you like. Adding potatoes to the soup thickens it beautifully and a dollop of crème fraiche or thick Greek yoghurt gives it a lovely richness.
A common advertising line is that mushrooms are “meat for vegetarians”. Although I don’t think this is accurate where my palate is concerned they are a big part of my autumn/fall menu at home. My usual go-to recipe is risotto, but a pot of soup hits the spot in colder weather. I used a selection of wild mushrooms (Slippery Jack and pine mushrooms) but you could use any mushrooms you like. Adding potatoes to the soup thickens it beautifully and a dollop of crème fraiche or thick Greek yoghurt gives it a lovely richness.


And where there is soup, there must be bread - at least that is the rule in my house. The easiest bread to make at home is focaccia. The dough is mixed by hand and there is very little kneading required. You just need a warm spot and a couple of hours to allow it to rise. Following a recipe I learned when I was travelling through the town of Bari in Puglia late last year, I added a warm cooked potato to the dough. Before baking I topped the dough with the thinly sliced cipolline, a variety of tiny, slightly squashed, mild and rather sweet onions, which I had sautéed in a dash of olive oil.
Served with a glass of Sangiovese, the soup and focaccia was a clear winner as a simple winter warmer meal (and you could also cheat and buy the bread...).

Mushroom and potato soup with cipolline onion focaccia
serves 4 as an entree
275g wild mushrooms, cleaned and sliced
dash olive oil
400g potato, cooked, peeled and diced
100g cipollina onions (or baby leeks), peeled/cleaned and thinly sliced
1 litre vegetable stock
salt and pepper to taste
finely chopped parsley
creme fraiche (1 large dollop per person)
Place the potato in a small saucepan filled with cold water. Bring to the boil then reduce the heat and simmer for 25-30 minutes until fork tender. Peel, dice and set aside.
While the potato is cooking, sauté the cipollina onions (or baby leeks) in a dash of olive oil in a medium-sized, lidded saucepan for 10 minutes on low heat until transluscent, making sure they do not colour.
Place the sliced mushrooms in a small frypan with a dash of olive oil on medium heat and sauté for about 3 minutes. Reserve a few (for serving) and toss the rest in with the onion. Add the previously cooked diced potato and a litre of vegetable stock. Bring to the boil, cover, reduce the heat and cook for about 10 minutes. Now remove from the heat, blend using a stick blender, add salt and pepper to taste and return to the heat and keep warm until you are ready to serve.
Place the soup in warmed serving bowls, stir through a spoonful of creme fraiche (to taste), toss in a few of the reserved slices of mushroom, finely chopped parsely and serve with cipolline onion focaccia.

Spaghetti al limone – spaghetti with lemon
We landed back in Australia a week ago today, after three glorious months in Italy and an epic road trip along the Adriatic coast.
As the trip was essentially a research trip for my next book Adriatico, days were spent talking to the locals, shopping in markets, taking photos of locations, and lots of eating and tasting the traditional local foods.
We landed back in Australia a week ago today, after three glorious months in Italy and an epic road trip along the Adriatic coast. As the trip was essentially a research trip for my next book Adriatico, days were spent talking to the locals, shopping in markets, taking photos of locations, and lots of eating and tasting the traditional local foods.
My original plan had included cooking along the way, so I could start testing recipes as we travelled. I had rented predominantly Air BnB apartments with kitchens, though their definition of a kitchen differs somewhat from mine, as some had little more than a place to heat up food in pans that were slightly suspect and blunt knives. Other kitchens, such as in the apartments I stayed in Otranto (Puglia), Trieste and Ravenna were very good, so I managed to do more cooking. And it wasn’t just cooking for the book; it was also cooking just to eat - regular food when we were tired of restaurants or when we had spent more than the budget I had put away for the trip on that day.
There was one recipe I returned to again and again during our travels - spaghetti al limone (spaghetti with lemon). And before you start thinking “oh, lemons and cream” - there is no cream in this, and it is simple enough to make in the most ill-equipped kitchen with a bare minimum of ingredients.

I have my Instagram friend Frank Prisinzano to thank for this one. He talks through recipes on Instagram and I was in Trieste in March when he posted about this dish. He is passionate about Italian food and cooking, with a focus on understanding the ingredients, thinking about what you are doing and why you are doing it. For Frank’s version (and my adopted version) of spaghetti al limone for two people, all you need is spaghetti, one lemon (preferably unsprayed), butter and finely grated parmesan cheese, and to follow a couple of rules:
- make sure the pasta cooking water is well salted
- taste it to check
- rather than adding salt later
- have all your ingredients ready before you start cooking the spaghetti; timing is key and the sauce needs to be made as soon as the spaghetti is on the harder side of “al dente”
- have a second pot on the stove warmed up for stirring the lemon and butter and the cooked pasta. If you stir it in a cold bowl/pot, the pasta will stop cooking immediately, the butter will not melt and the dish will not be as creamy
- make sure the parmesan cheese (Grana or Parmigiano Reggiano) is finely grated so that it melts completely and adds to the creaminess of the dish
So here is the recipe that got me through cooking in apartments with little equipment and even fewer ingredients sometimes in remote places all through Italy.
spaghetti al limone - lemon spaghetti
Serves 4
320-400g dried spaghetti (portions are 80-100g per person)
2 organic small/medium lemons
160g unsalted butter (at room temperature)
80g finely grated parmesan cheese
freshly cracked pepper
extra-virgin olive oil (optional)
Bring a large salted pot of water to the boil. While it is boiling prepare your other ingredients; squeeze the lemons and keep the lemon halves to one side; finely grate the cheese and set aside; chop the butter.
When the water is boiling, drop in the spaghetti, pushing it down using tongs when it starts to soften to make sure it is immersed in the water and cooks evenly. Give it a cook stir when it is all immersed to ensure it does not stick together. Taste the cooking water to make sure it is salty enough.
Place your serving plates in a low oven to keep them warm. Have a second pot ready and warm on the stove to make the sauce, turning off the heat just before you add the cooked spaghetti.
Taste the spaghetti to check that is is cooked just slightly short of the point at which is it cooked to your liking. Lift up the pasta using tongs into the second warmed pot. It is ok if some of the cooking water drops in. Now add the chopped butter and lemon juice and stir using a wooden spoon until it becomes creamy, adding more cooking water if needed. Drop in the reserved lemon halves as well. It may take a minute of stirring until it is really creamy.
Then stir in the grated cheese until it melts and pile onto warmed serving plates. Scatter on some freshly cracked pepper, drizzle a bit of extra virgin olive oil (optional) and add a bit more cheese if you like (this is my preference, I like to see the cheese on top). Garnish with a lemon half and serve immediately.

Cavatelli with sausages, peas and cinnamon
Today I will be sharing one of my favourite non-vegetarian pasta sauce dishes. I eat very little meat (and fish) for environmental and ethical reasons, usually once a week, and a bit more so in winter.

Today I will be sharing one of my favourite non-vegetarian pasta sauce dishes. I eat very little meat (and fish) for environmental and ethical reasons, usually once a week, and a bit more so in winter.
My local butcher Matt from the Butcher’s Block in Clifton Hill makes the best sausages at the back of his shop. I love the pork and fennel sausages he makes as well as the Mediterranean lamb. I love to break the sausages into chunks and turn them into a pasta sauce. Apart from the sausages, this is a pantry ingredient dish with peas and tomatoes. It is nothing fancy but thoroughly delicious, especially when you add chilli flakes and a hint of powdered cinnamon.
Frozen peas are the only frozen vegetable I use; they are so convenient and the baby ones are really very good. I always have a bag or two in the freezer. They are great with ricotta (replace the usual spinach with peas to make a filling for a savoury pie); in a braise with some ham or pancetta (this was one of my mamma’s signature dishes); cooked with garlic, olive oil and a splash of white wine until they are soft and mushy (then eaten with potato mash); and with tinned tomatoes. I mean, how good are frozen baby peas?!

I made my own cavatelli for this dish, using semolina flour and water. Cavatelli are a traditional Sicilian pasta shape and they look very even because I have a hand cranked cavatelli rolling machine (the brand is Miss Peppa, made in Italy) that spits out cavatelli quickly and evenly. They can also easily be made by hand using a gnocchi board to make the ribbed contour which catches sauce, but the machine is a bit quicker.
Cavatelli with sausages, peas and cinnamon
Serves 4
400g dried or fresh cavatelli pasta
3 pork and fennel sausages
extra virgin olive oil
1/2 cup red wine
1 tin (440g) good quality peeled tomatoes (eg Mutti)
1/2 teaspoon powdered cinnamon
good pinch of dried chilli flakes
2/3 cup frozen peas
grated parmesan cheese to serve
fresh parsley or mint leaves, chopped, to serve
Remove the casings from the sausages and break up the meat into chunks. Add a glug of olive oil to a medium-sized frypan on medium-high and add the sausage pieces. Cook for about 8 minutes until the meat has cooked through, stirring every minute or so, then add the wine.
Let that cook off for a couple of minutes, then sprinkle on the cinnamon, the chilli flakes and the tin of tomatoes. Turn the heat down to medium low and allow to simmer before adding the peas. Stir them through then cook for another ten or so minutes. If the sauce starts to look a bit thick, dilute it with a bit of pasta cooking water (see below).
Bring a large pot of salted water to the boil and cook until just before it is done to your liking. Set aside half a cup of cooking water before draining the pasta in a colander. Add the drained pasta to the frypan with the sauce, and allow it to cook on medium heat for another minute, stirring the contents of the pan so that the sauce covers the pasta, and adding a bit of the cooking water that you have set aside if needed. Taste and adjust the salt if needed.
Serve sprinkled with grated parmesan cheese and some fresh parsley or mint leaves.